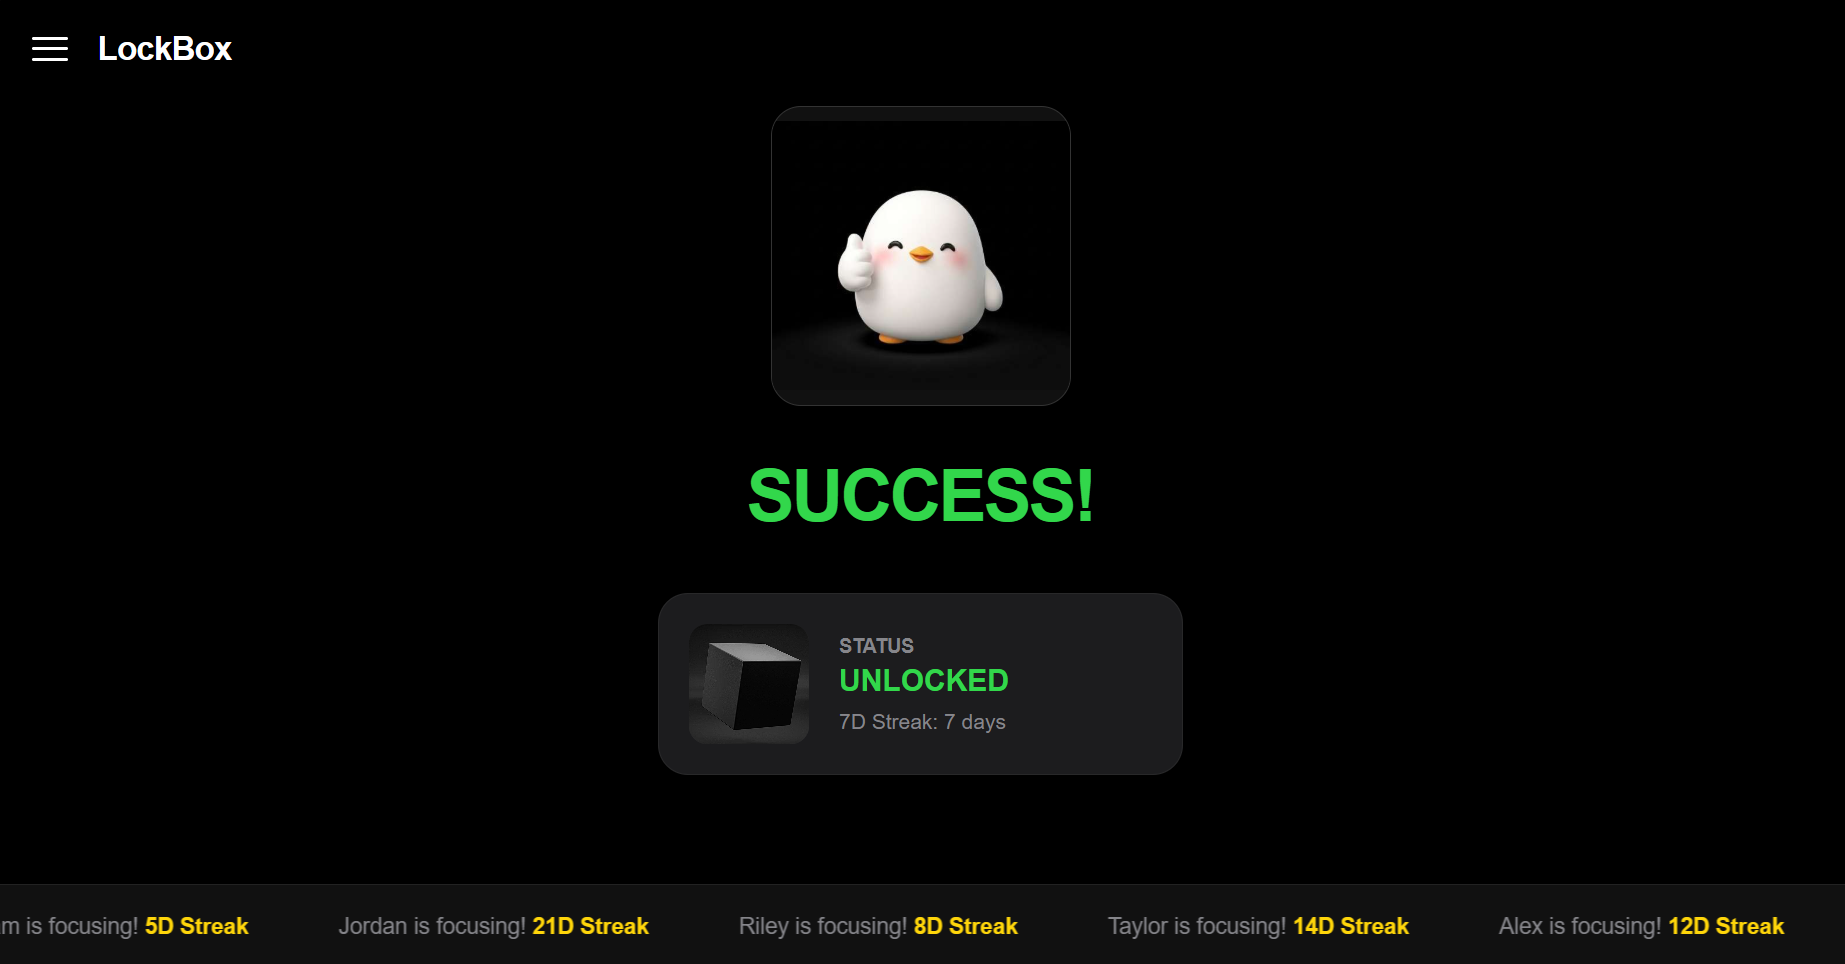
LockBox is a hardware-integrated focus tool designed to help students and professionals stay off their phones. You place your phone in the box, set a timer, and the box remains physically locked until the session is complete. It features a high-end, Apple-inspired web dashboard for real-time tracking and social "streak" sharing.
Live Demo: https://tasdidnoor.com/LockBox/
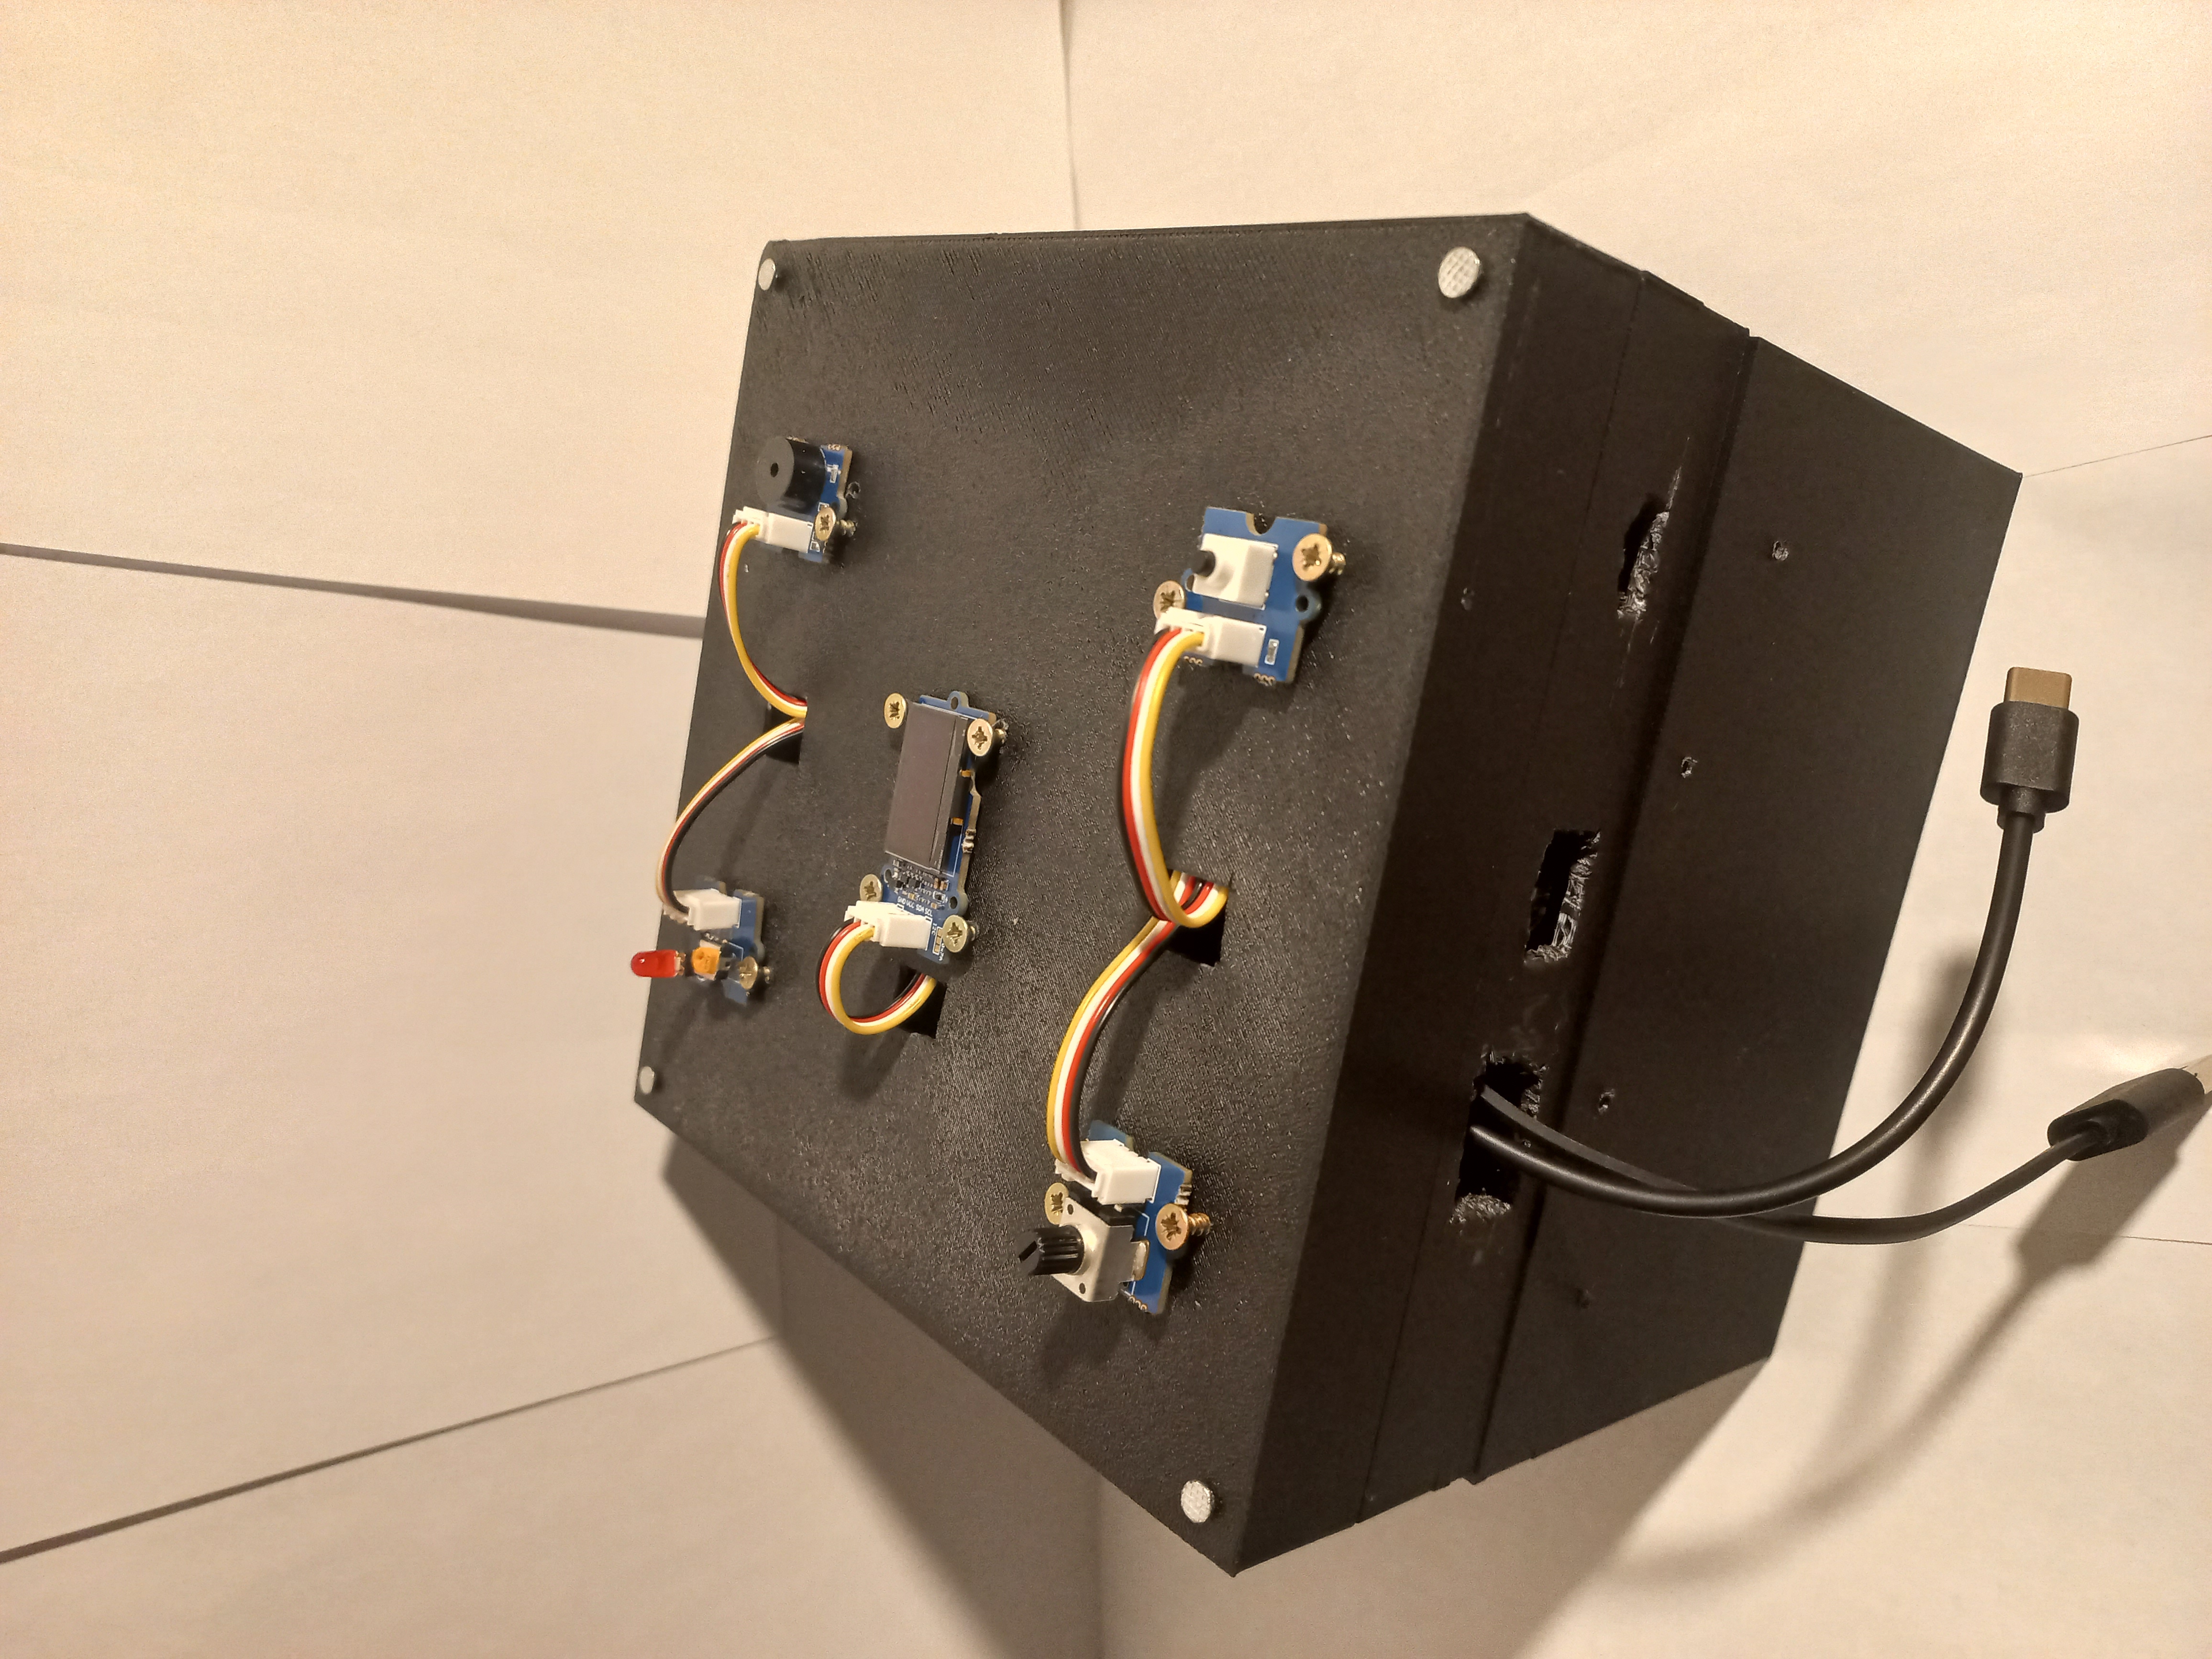
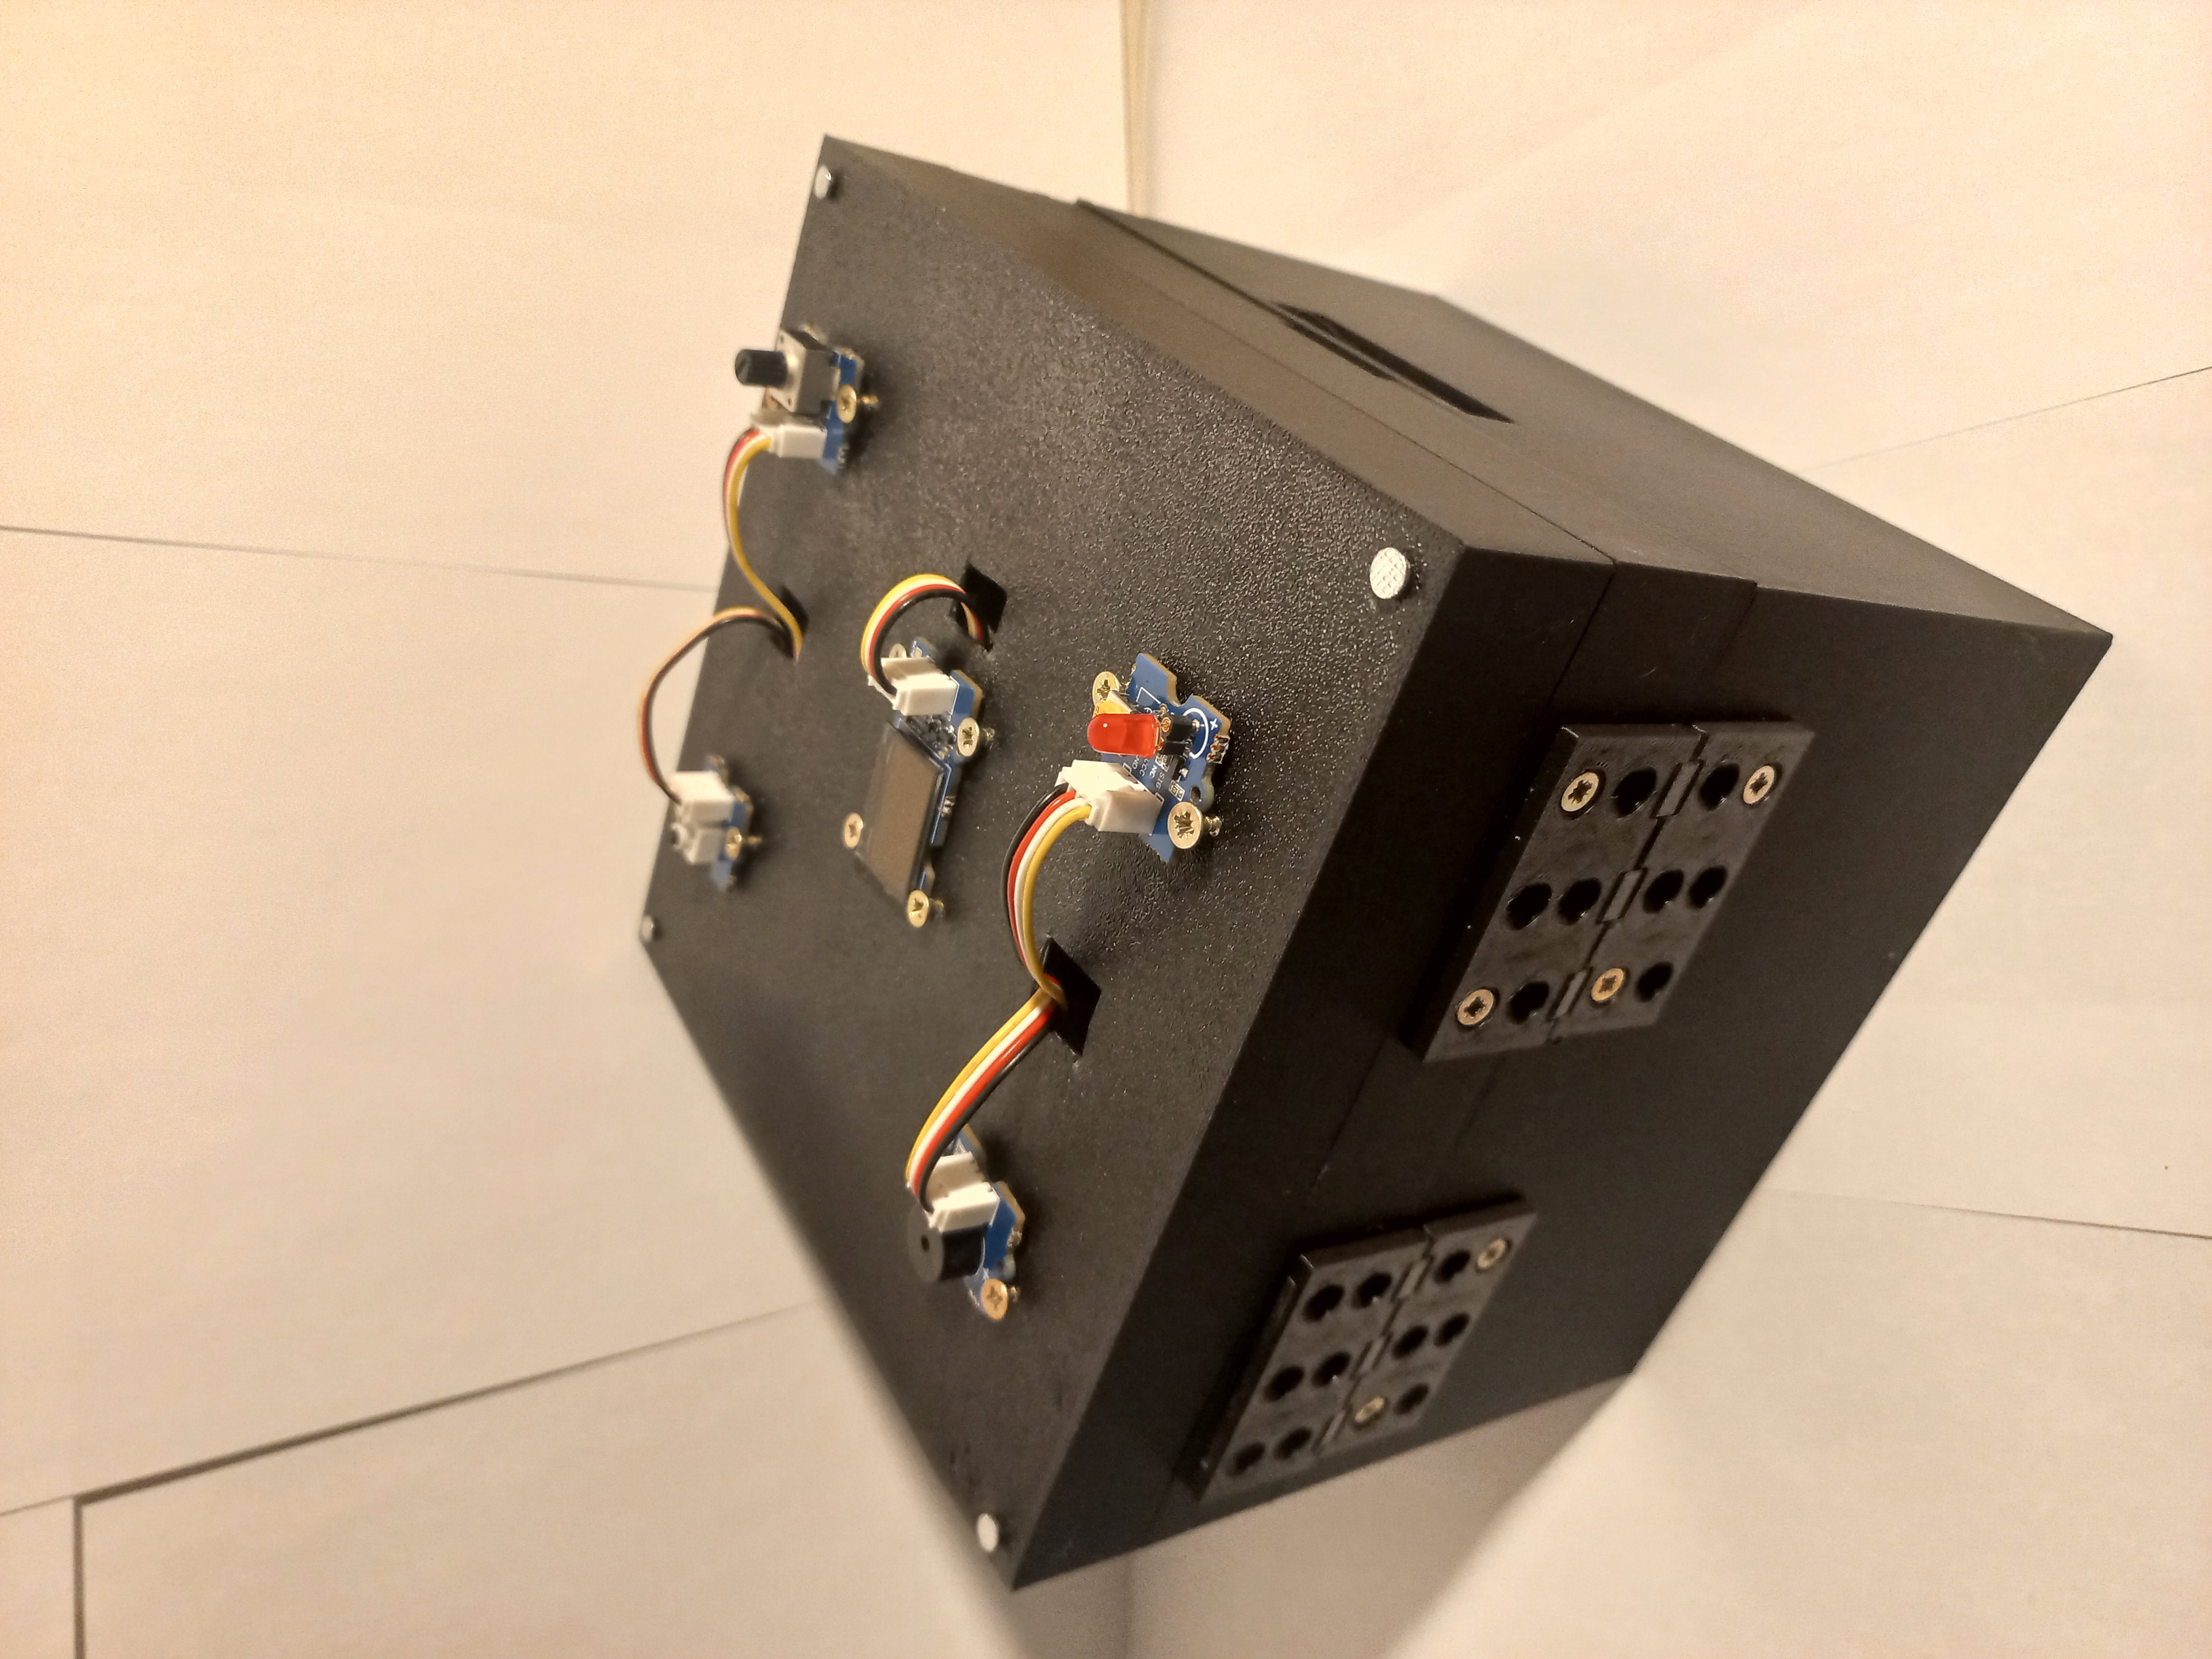
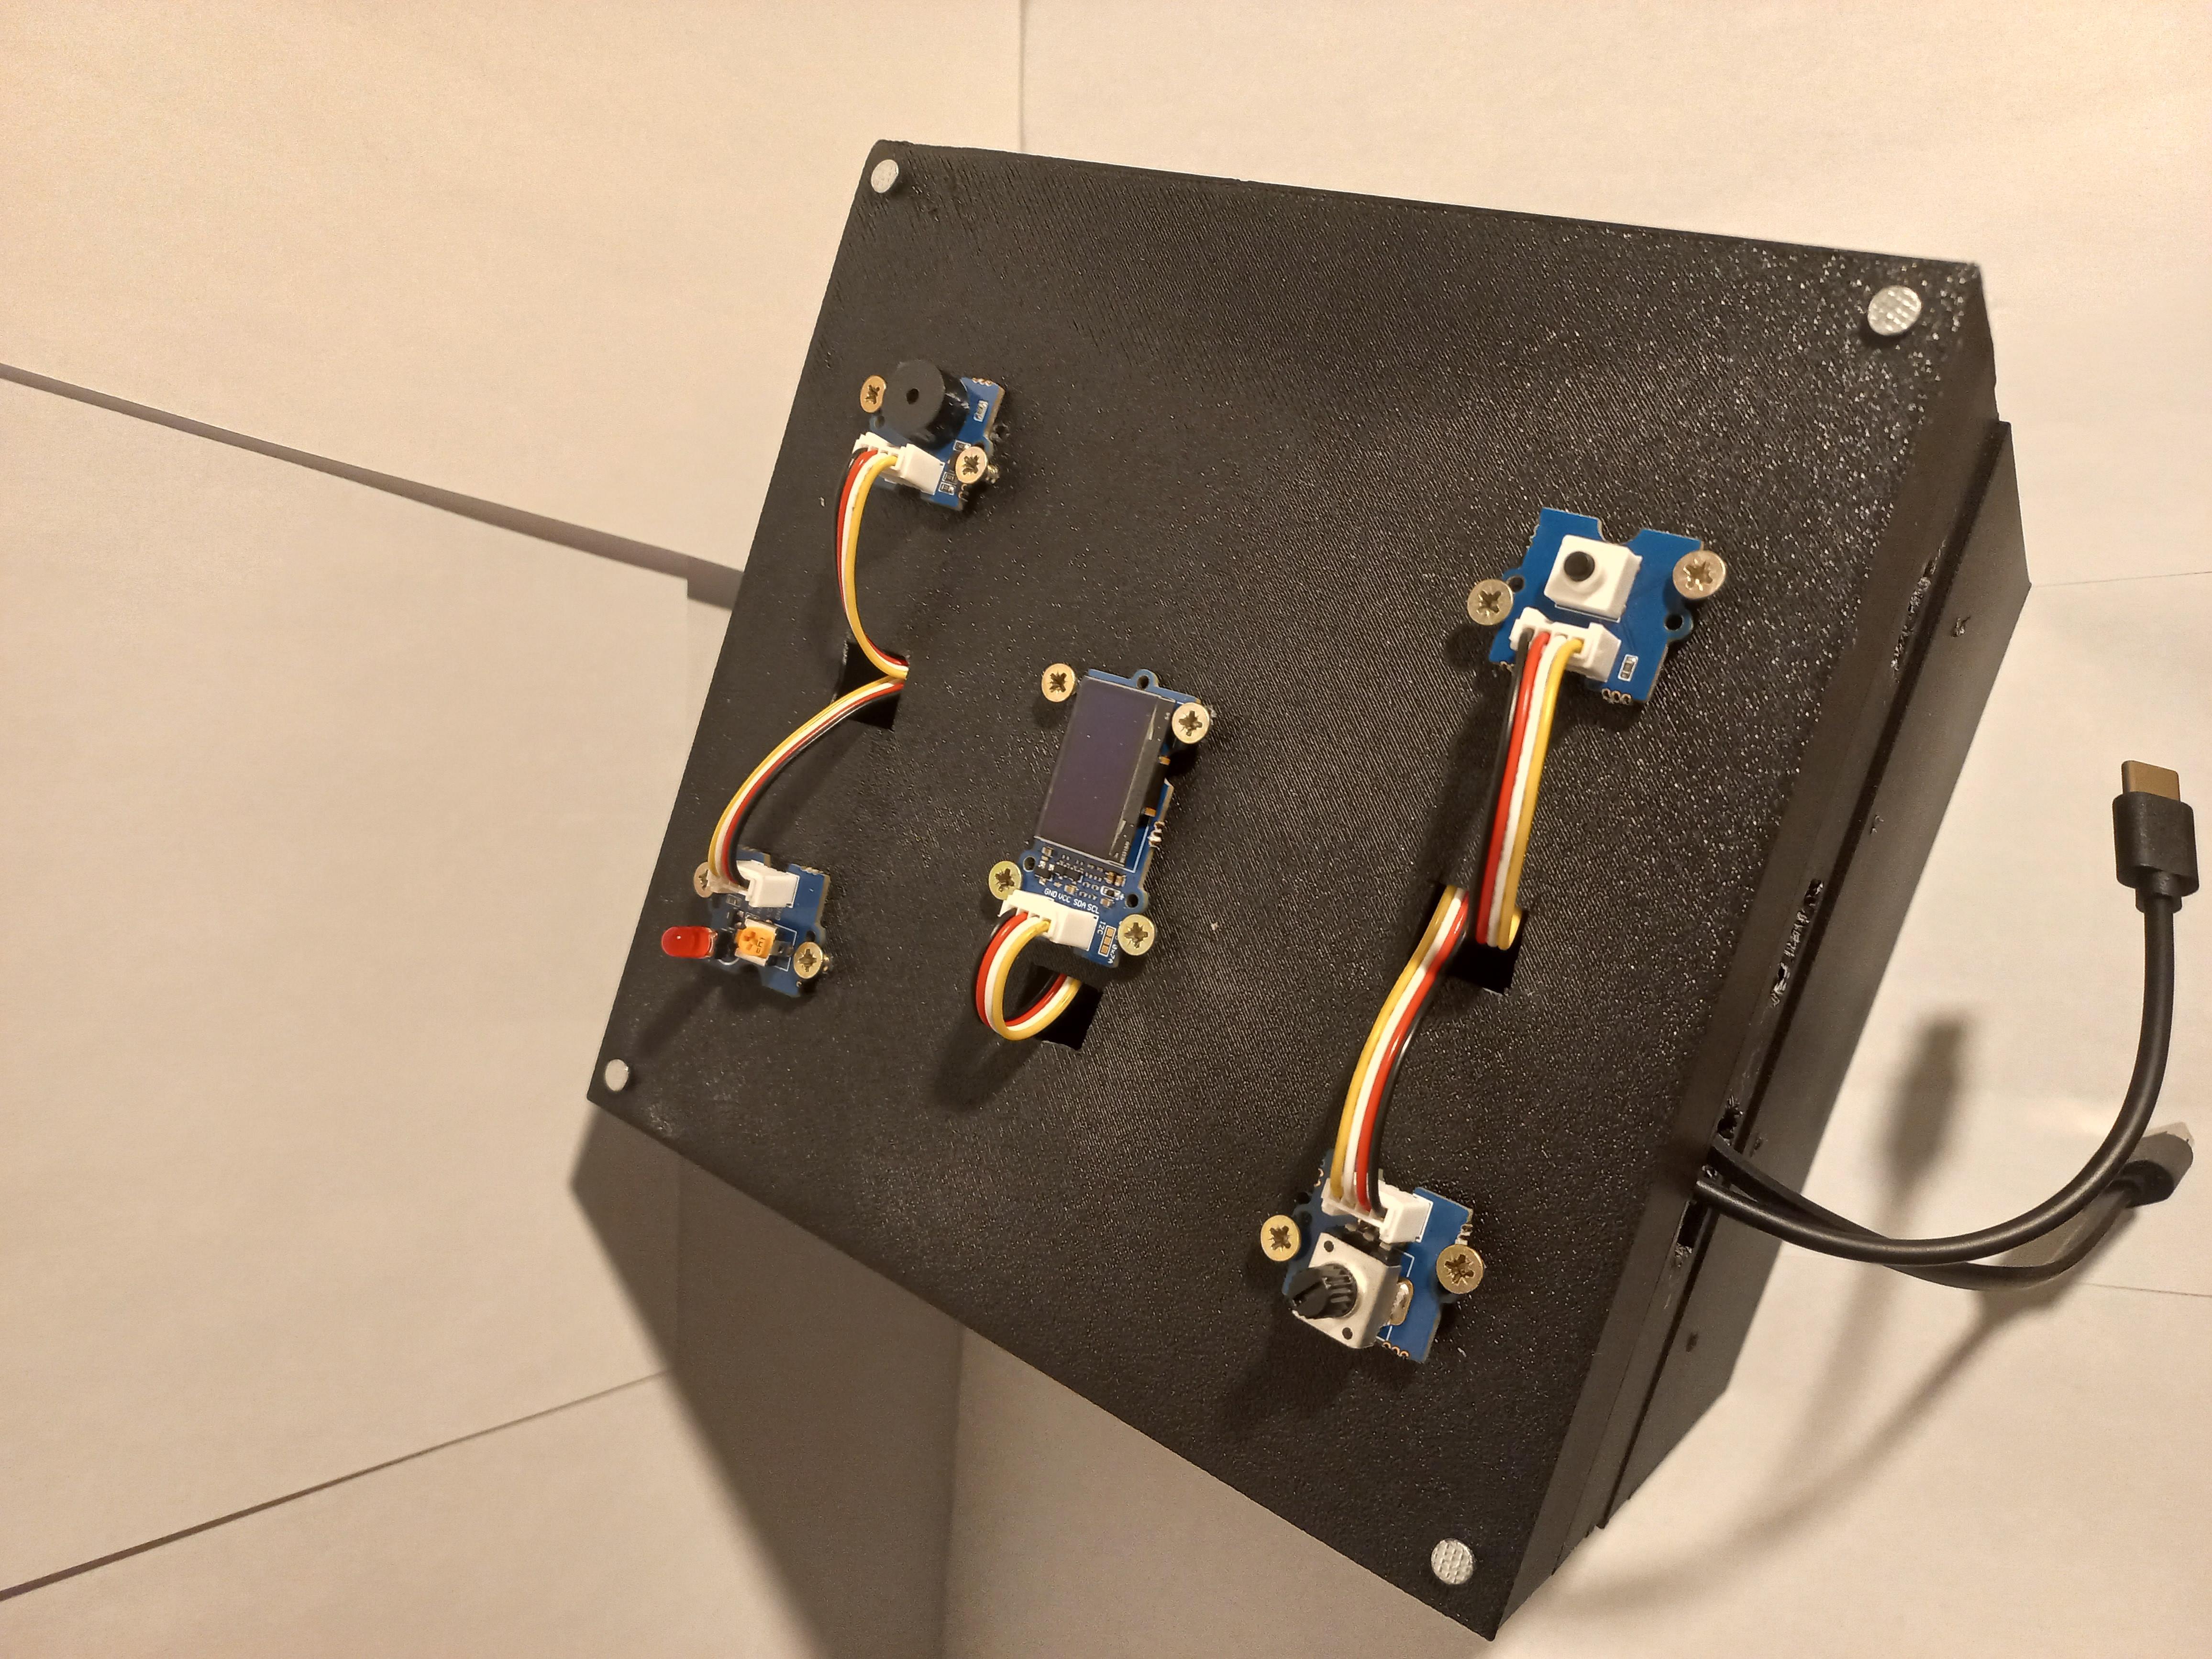
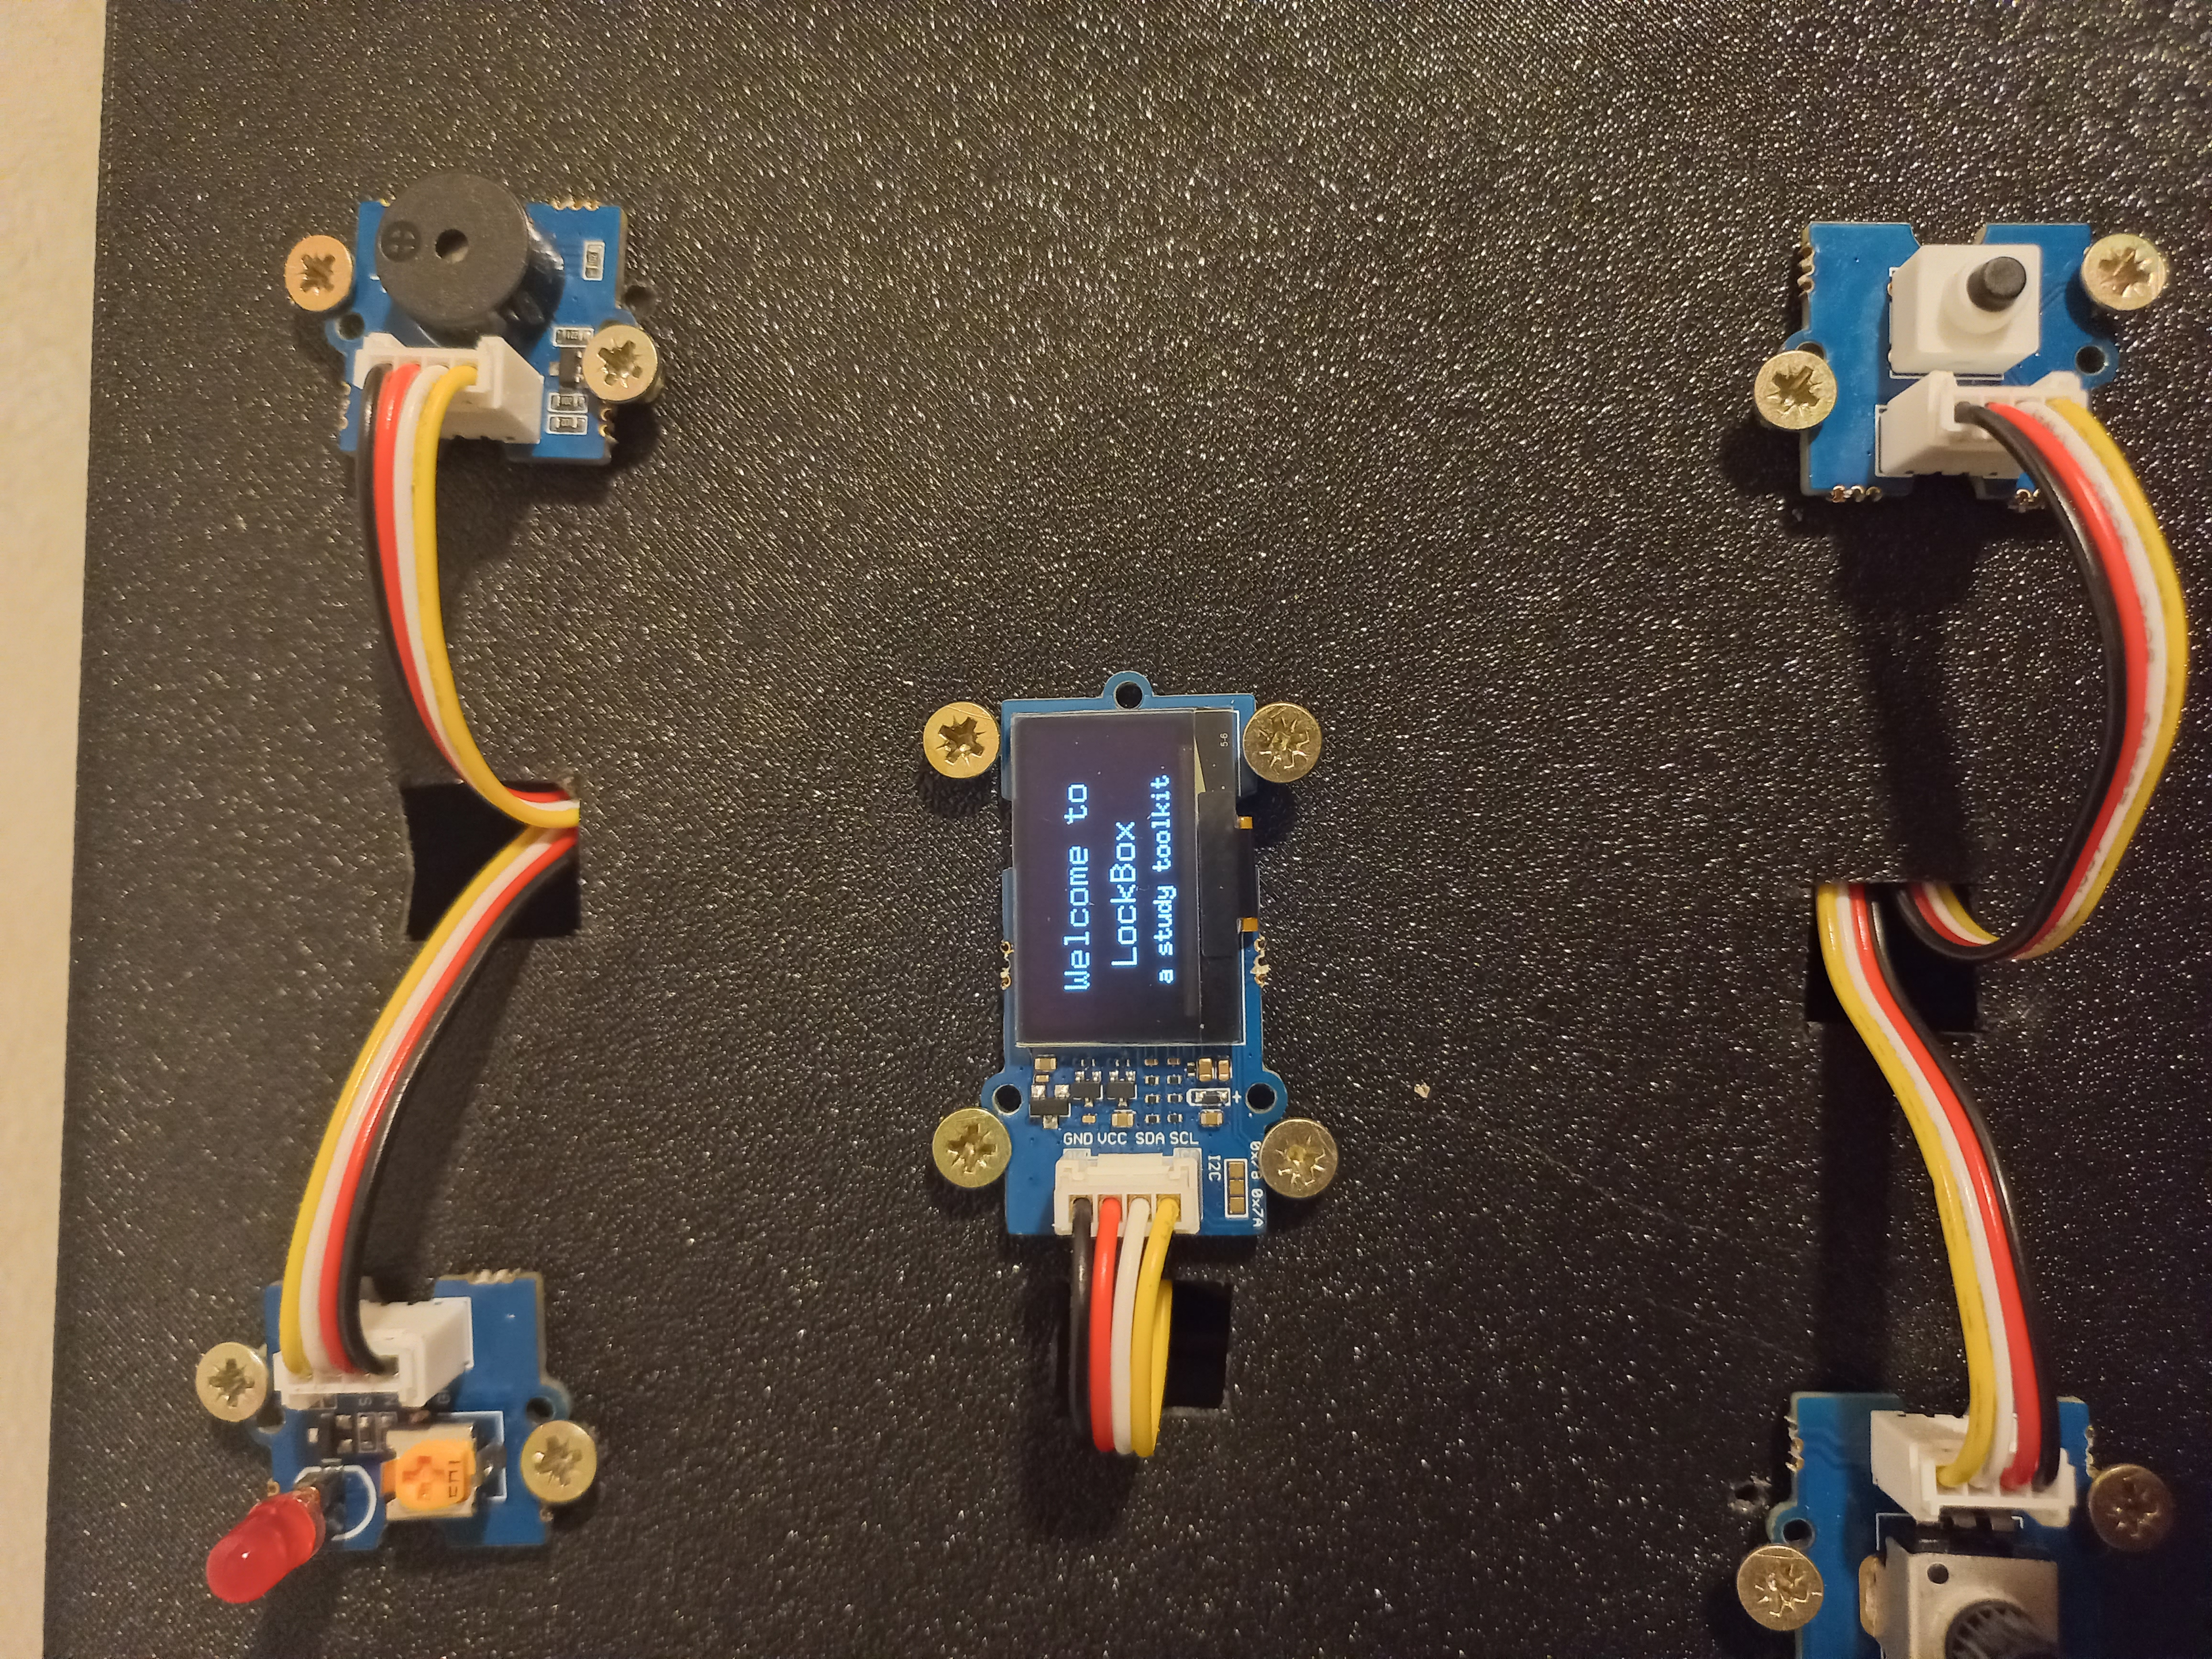
- Grove Beginner Kit for Arduino (Includes Arduino Uno, OLED, LED, Buzzer, Button, and Potentiometer).
- ESP32-C3 Mini (To host the Access Point and Web Server).
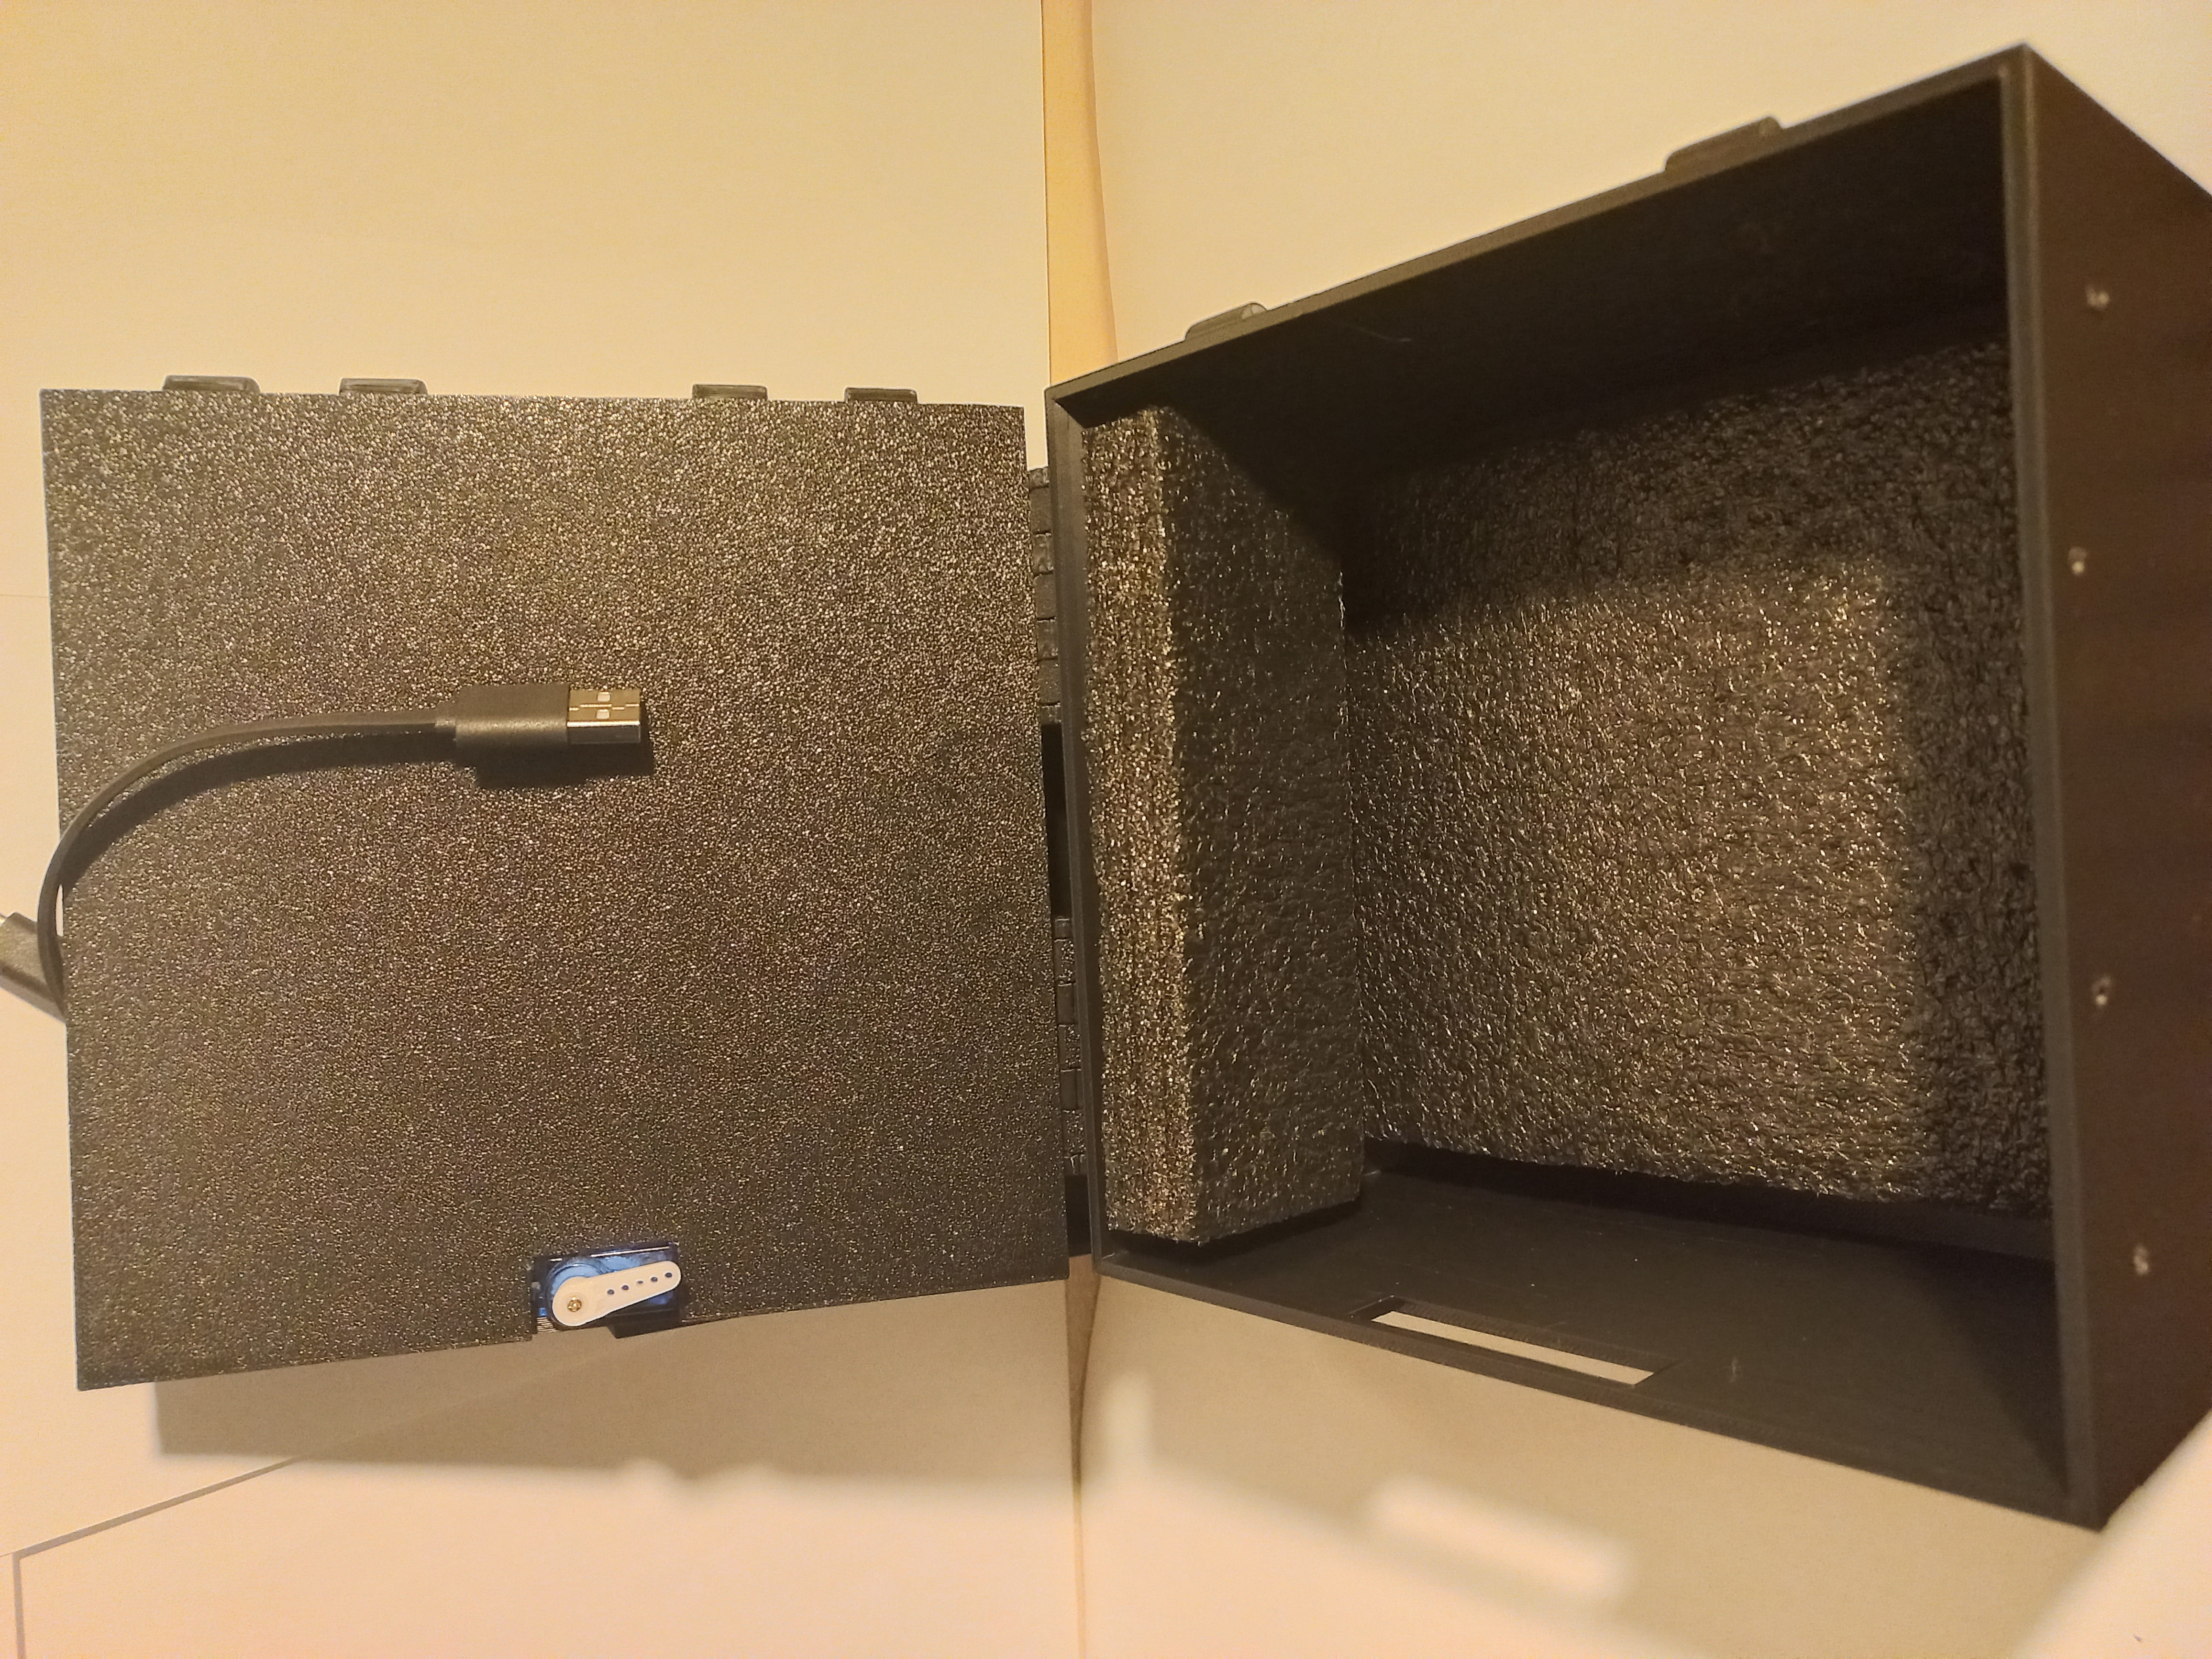
- Micro Servo (9g) (Connected to D7 for the locking mechanism).
- Jumper Wires (M-F and M-M).
| Component | Pin | Note |
|---|---|---|
| LED | D4 | Status and Countdown alerts |
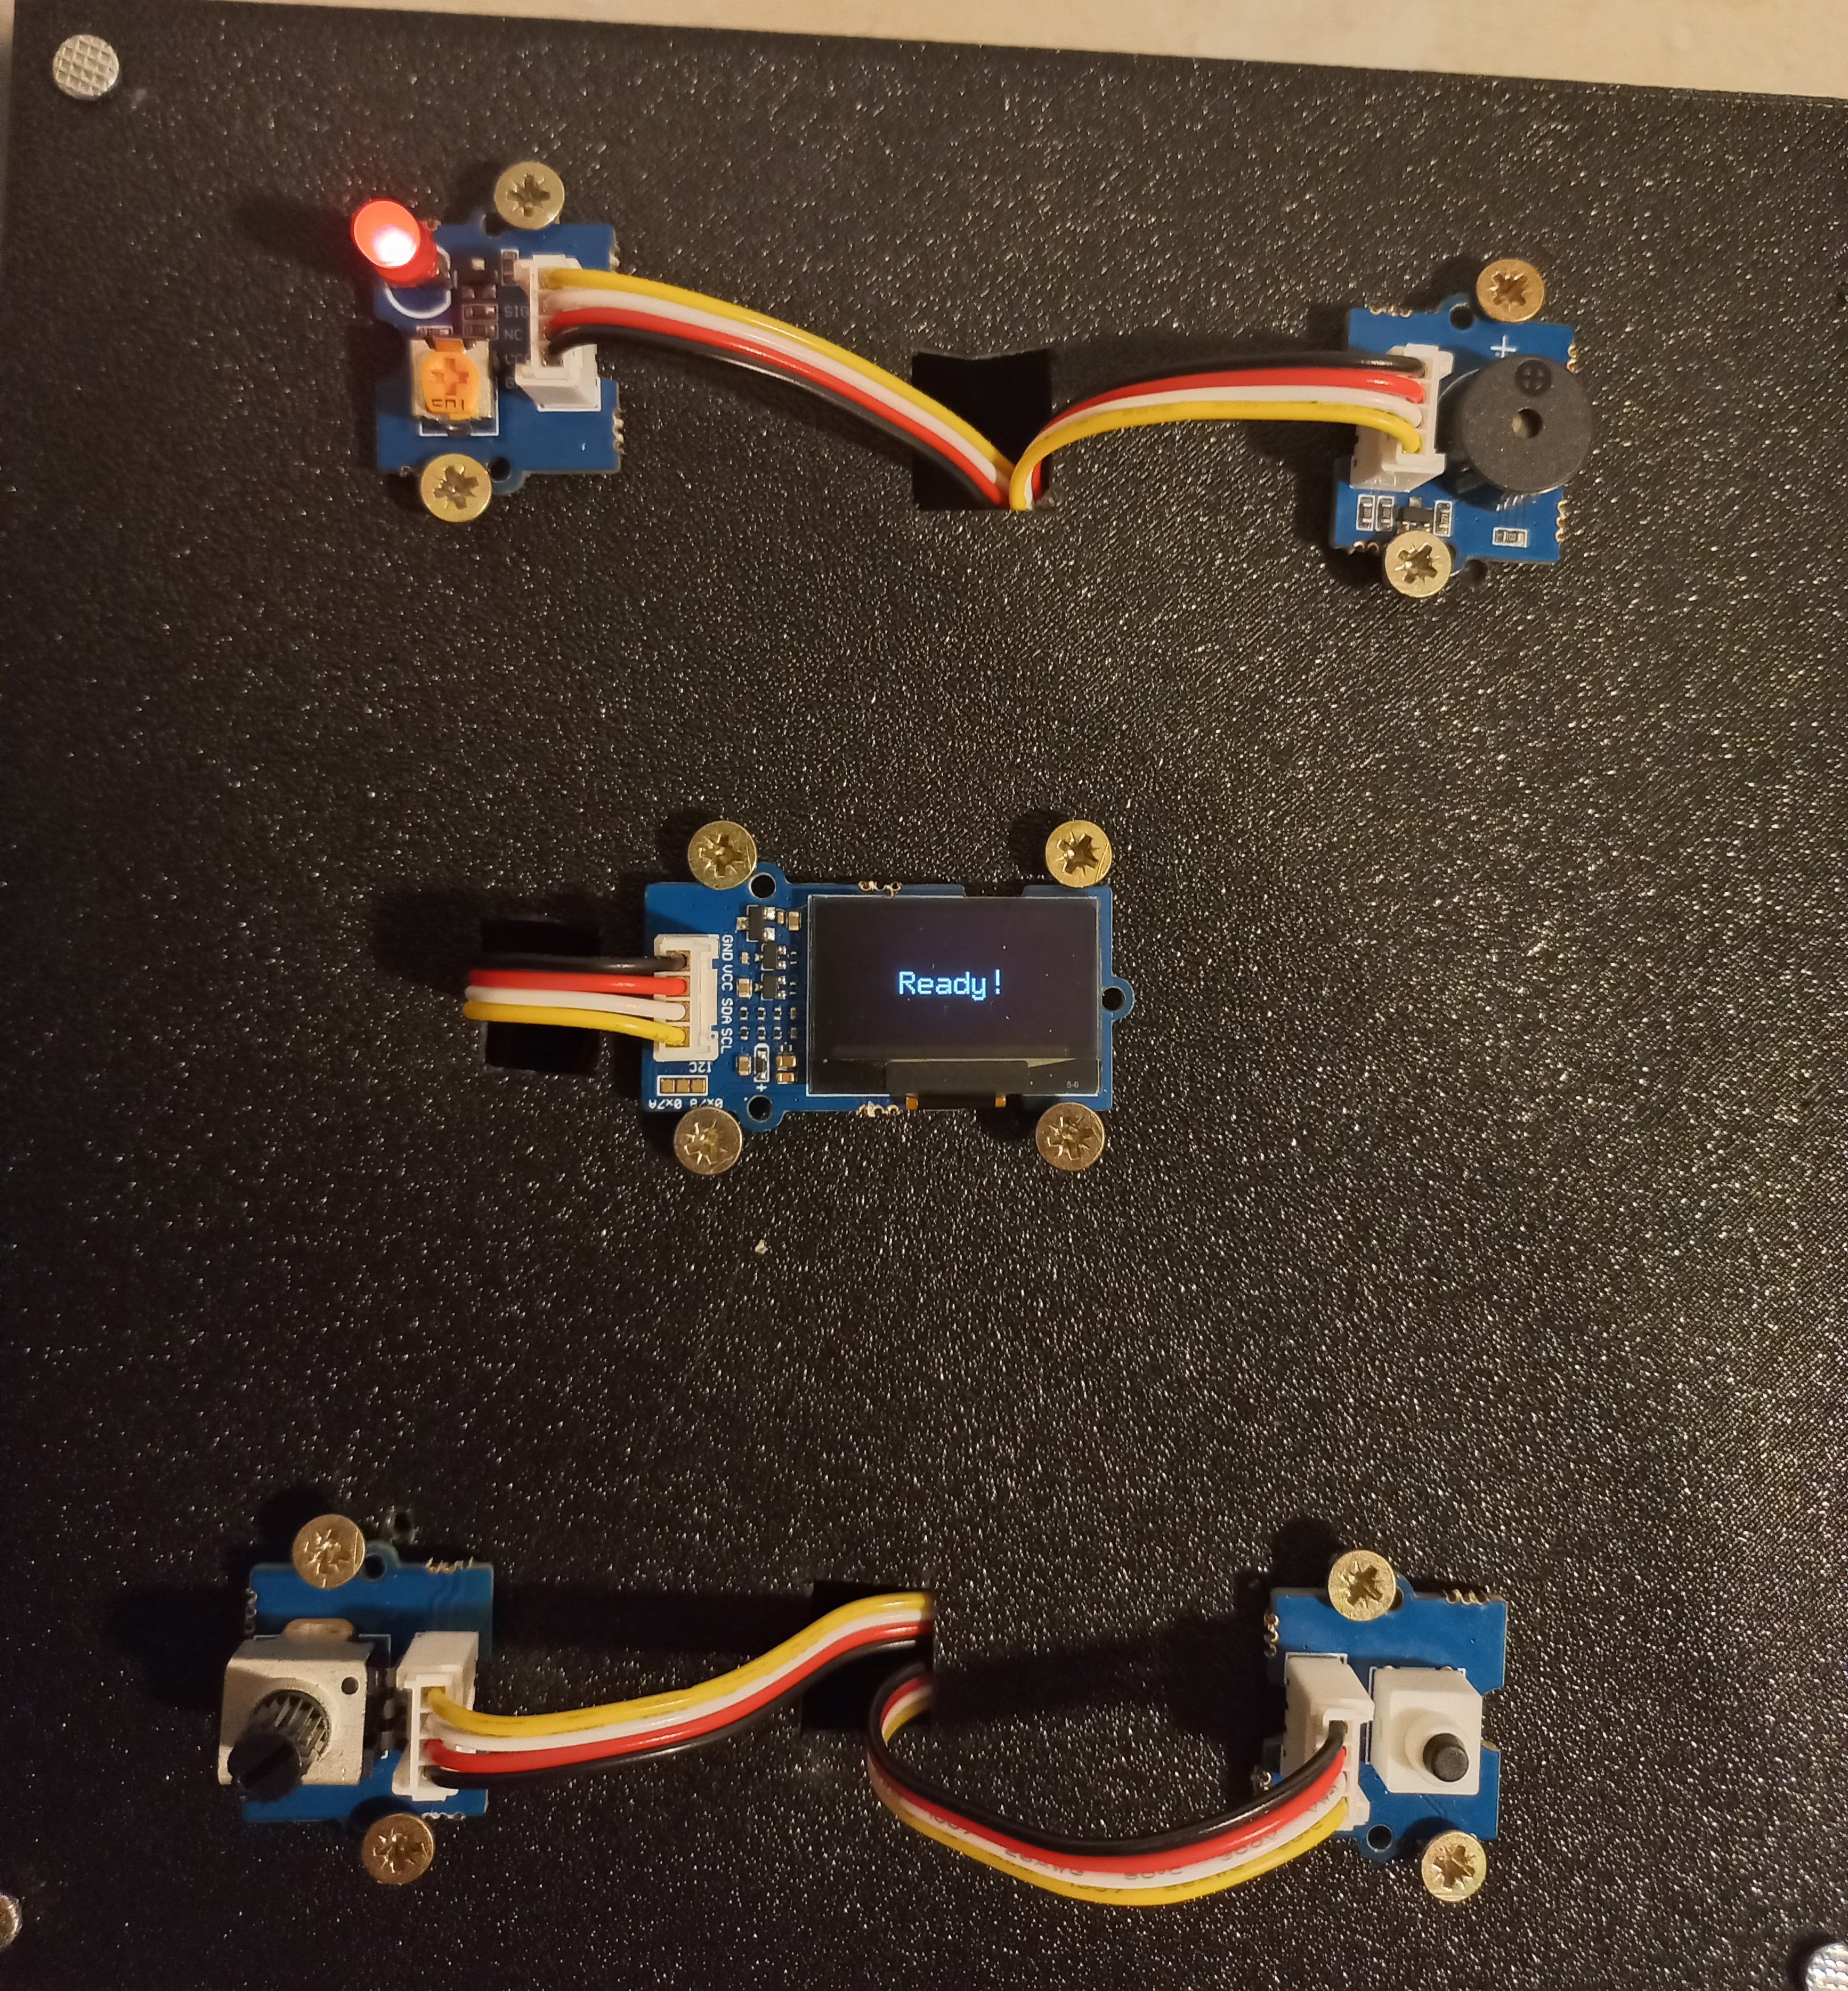
| Buzzer | D5 | "Ready" and Emergency alerts |
| Button | D6 | Confirm selection / Emergency trigger |
| Potentiometer | A0 | Timer duration selection |
| Servo | D7 | Locking mechanism |
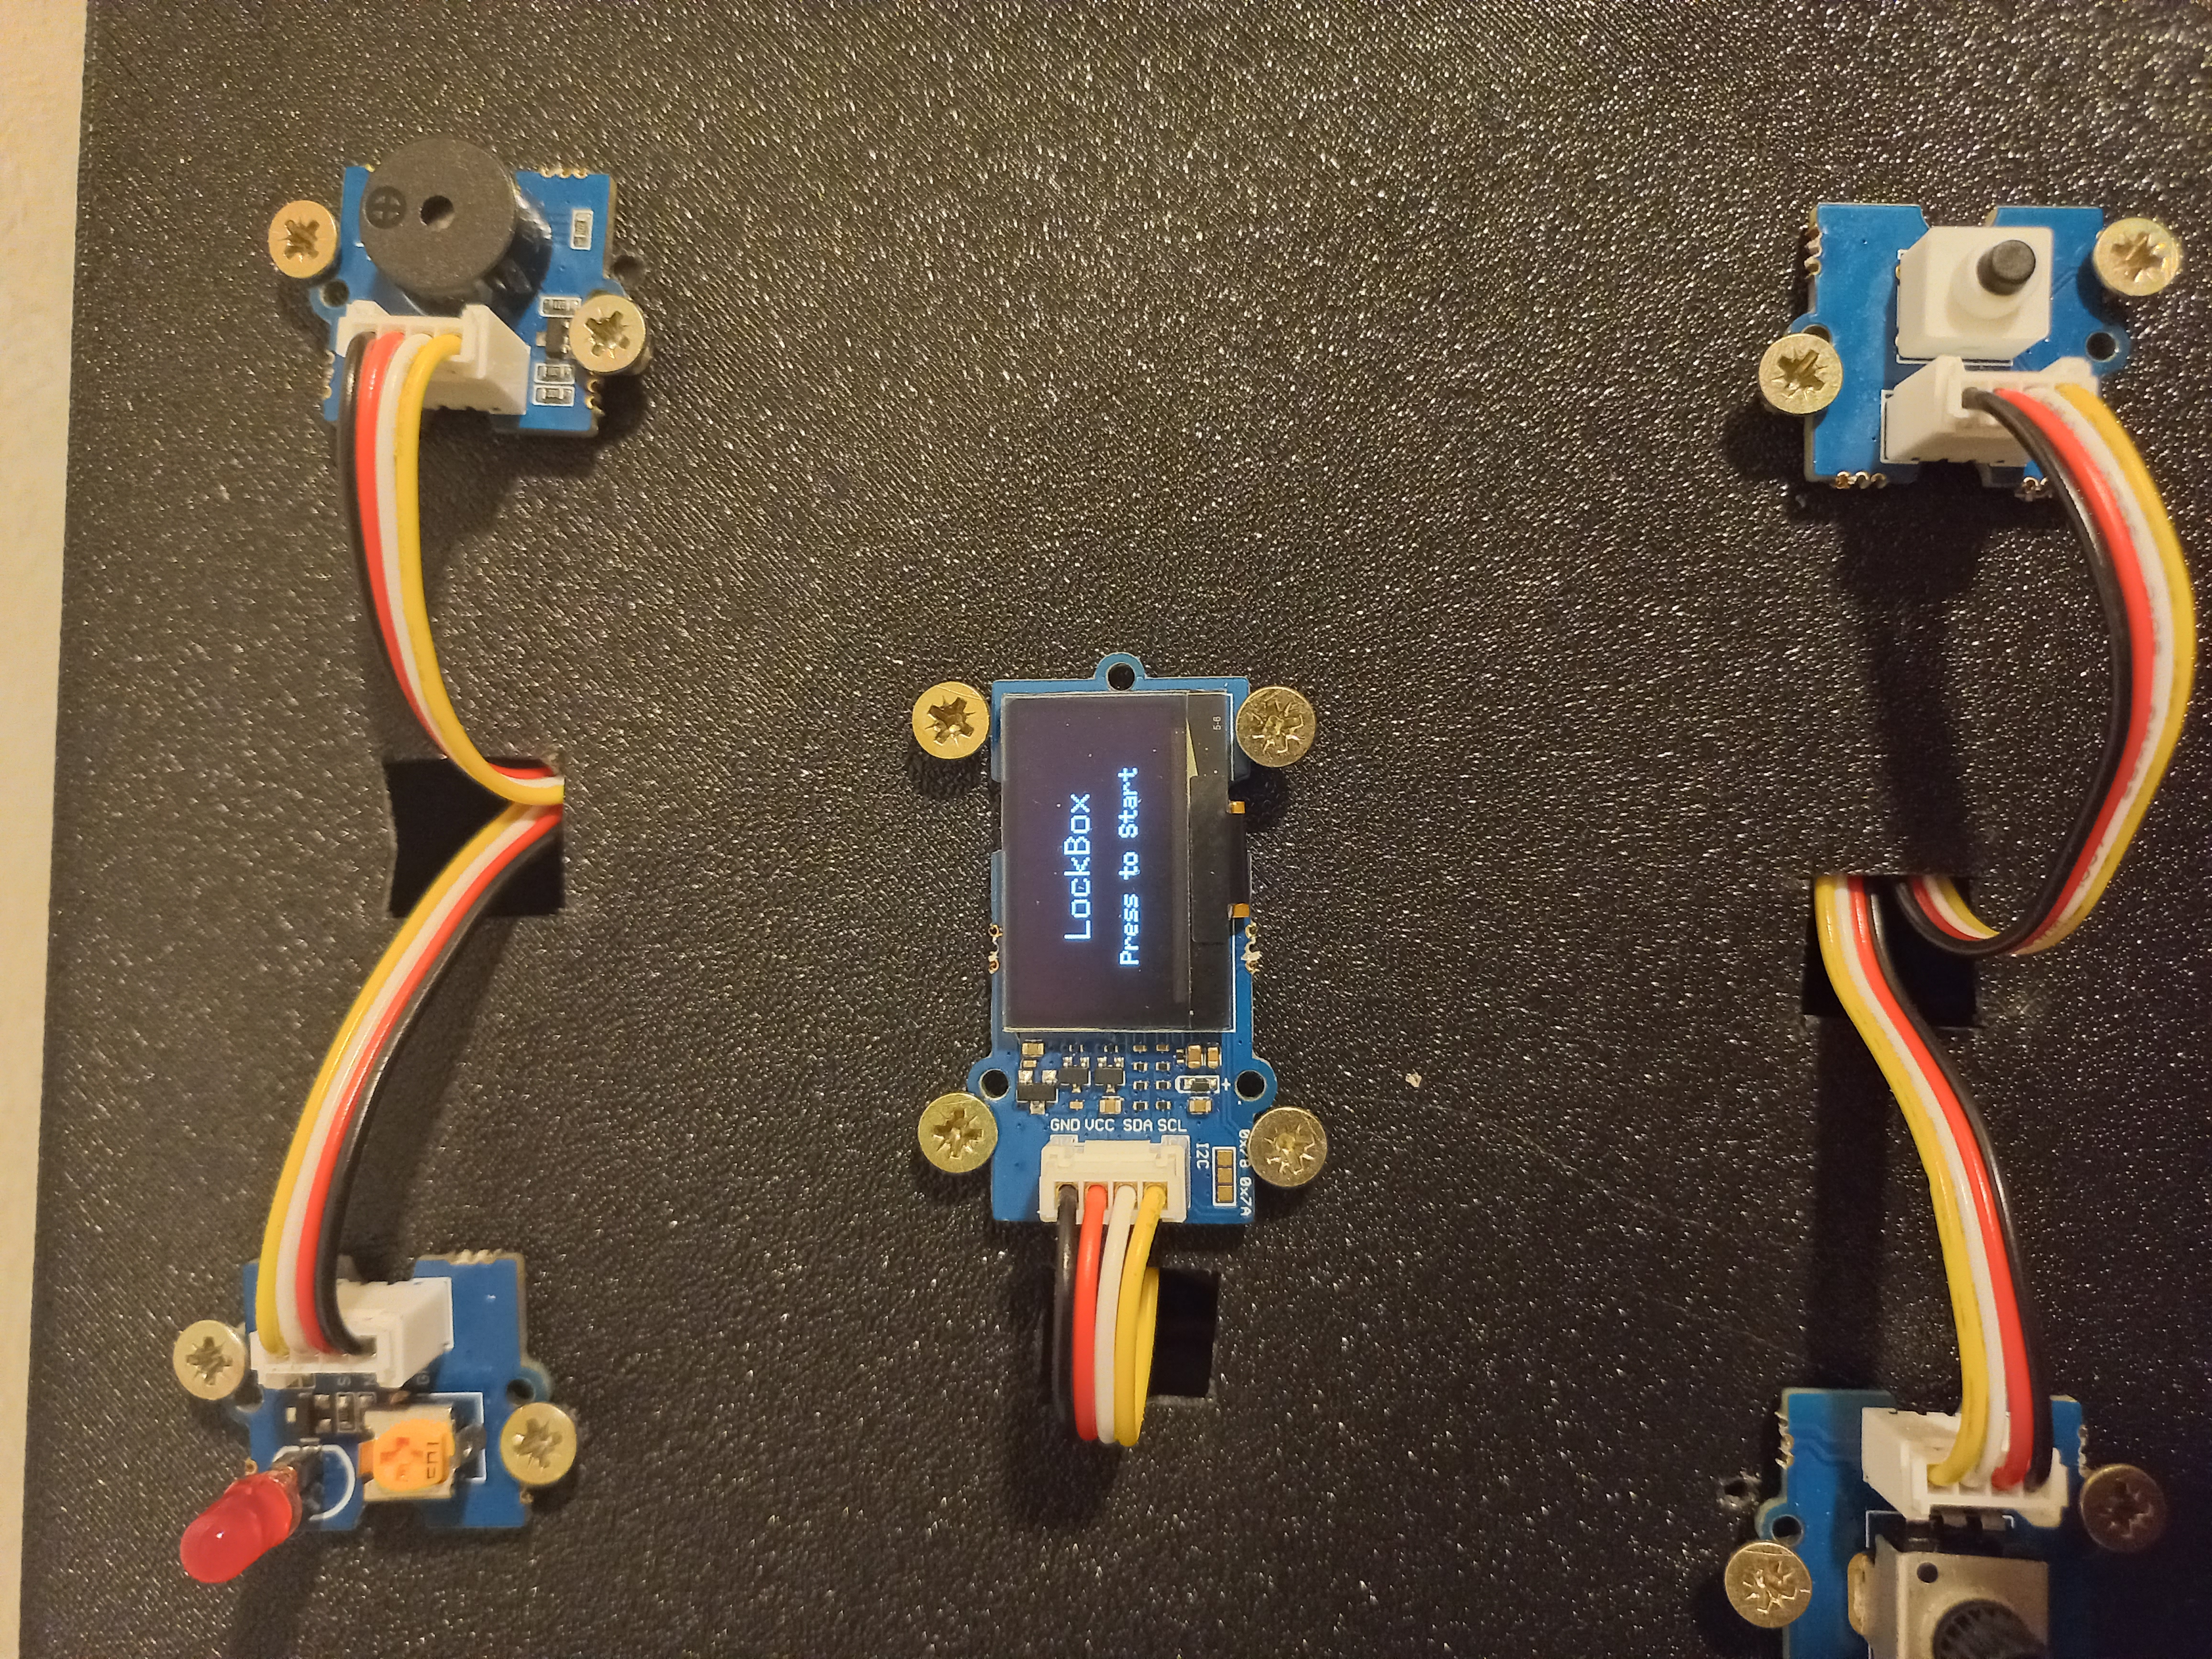
| OLED | IIC | User interface |
| Grove Board Pin | ESP32-C3 Pin | Note |
|---|---|---|
| TX (D1) | RX (Pin 3) | Serial Data Out |
| RX (D0) | TX (Pin 4) | Serial Data In |
| GND | GND | CRITICAL: Mandatory for signal stability |
Install these via the Arduino Library Manager:
U8g2by oliver (For OLED Display)Servoby Michael Margolis (For Locking mechanism)WiFiandWebServer(Built-in for ESP32)
- Open
LockBox/LockBox.ino. - Select Arduino Uno as your board.
- Click Upload.
- Open
Static_Webpagev2/Static_Webpagev2.ino. - Select ESP32C3 Dev Module (or your specific C3 board).
- Click Upload.
- Power Up: Connect both boards to power (USB or battery).
- Start Session:
- Press the button on the Grove board to enter the "Welcome" screen.
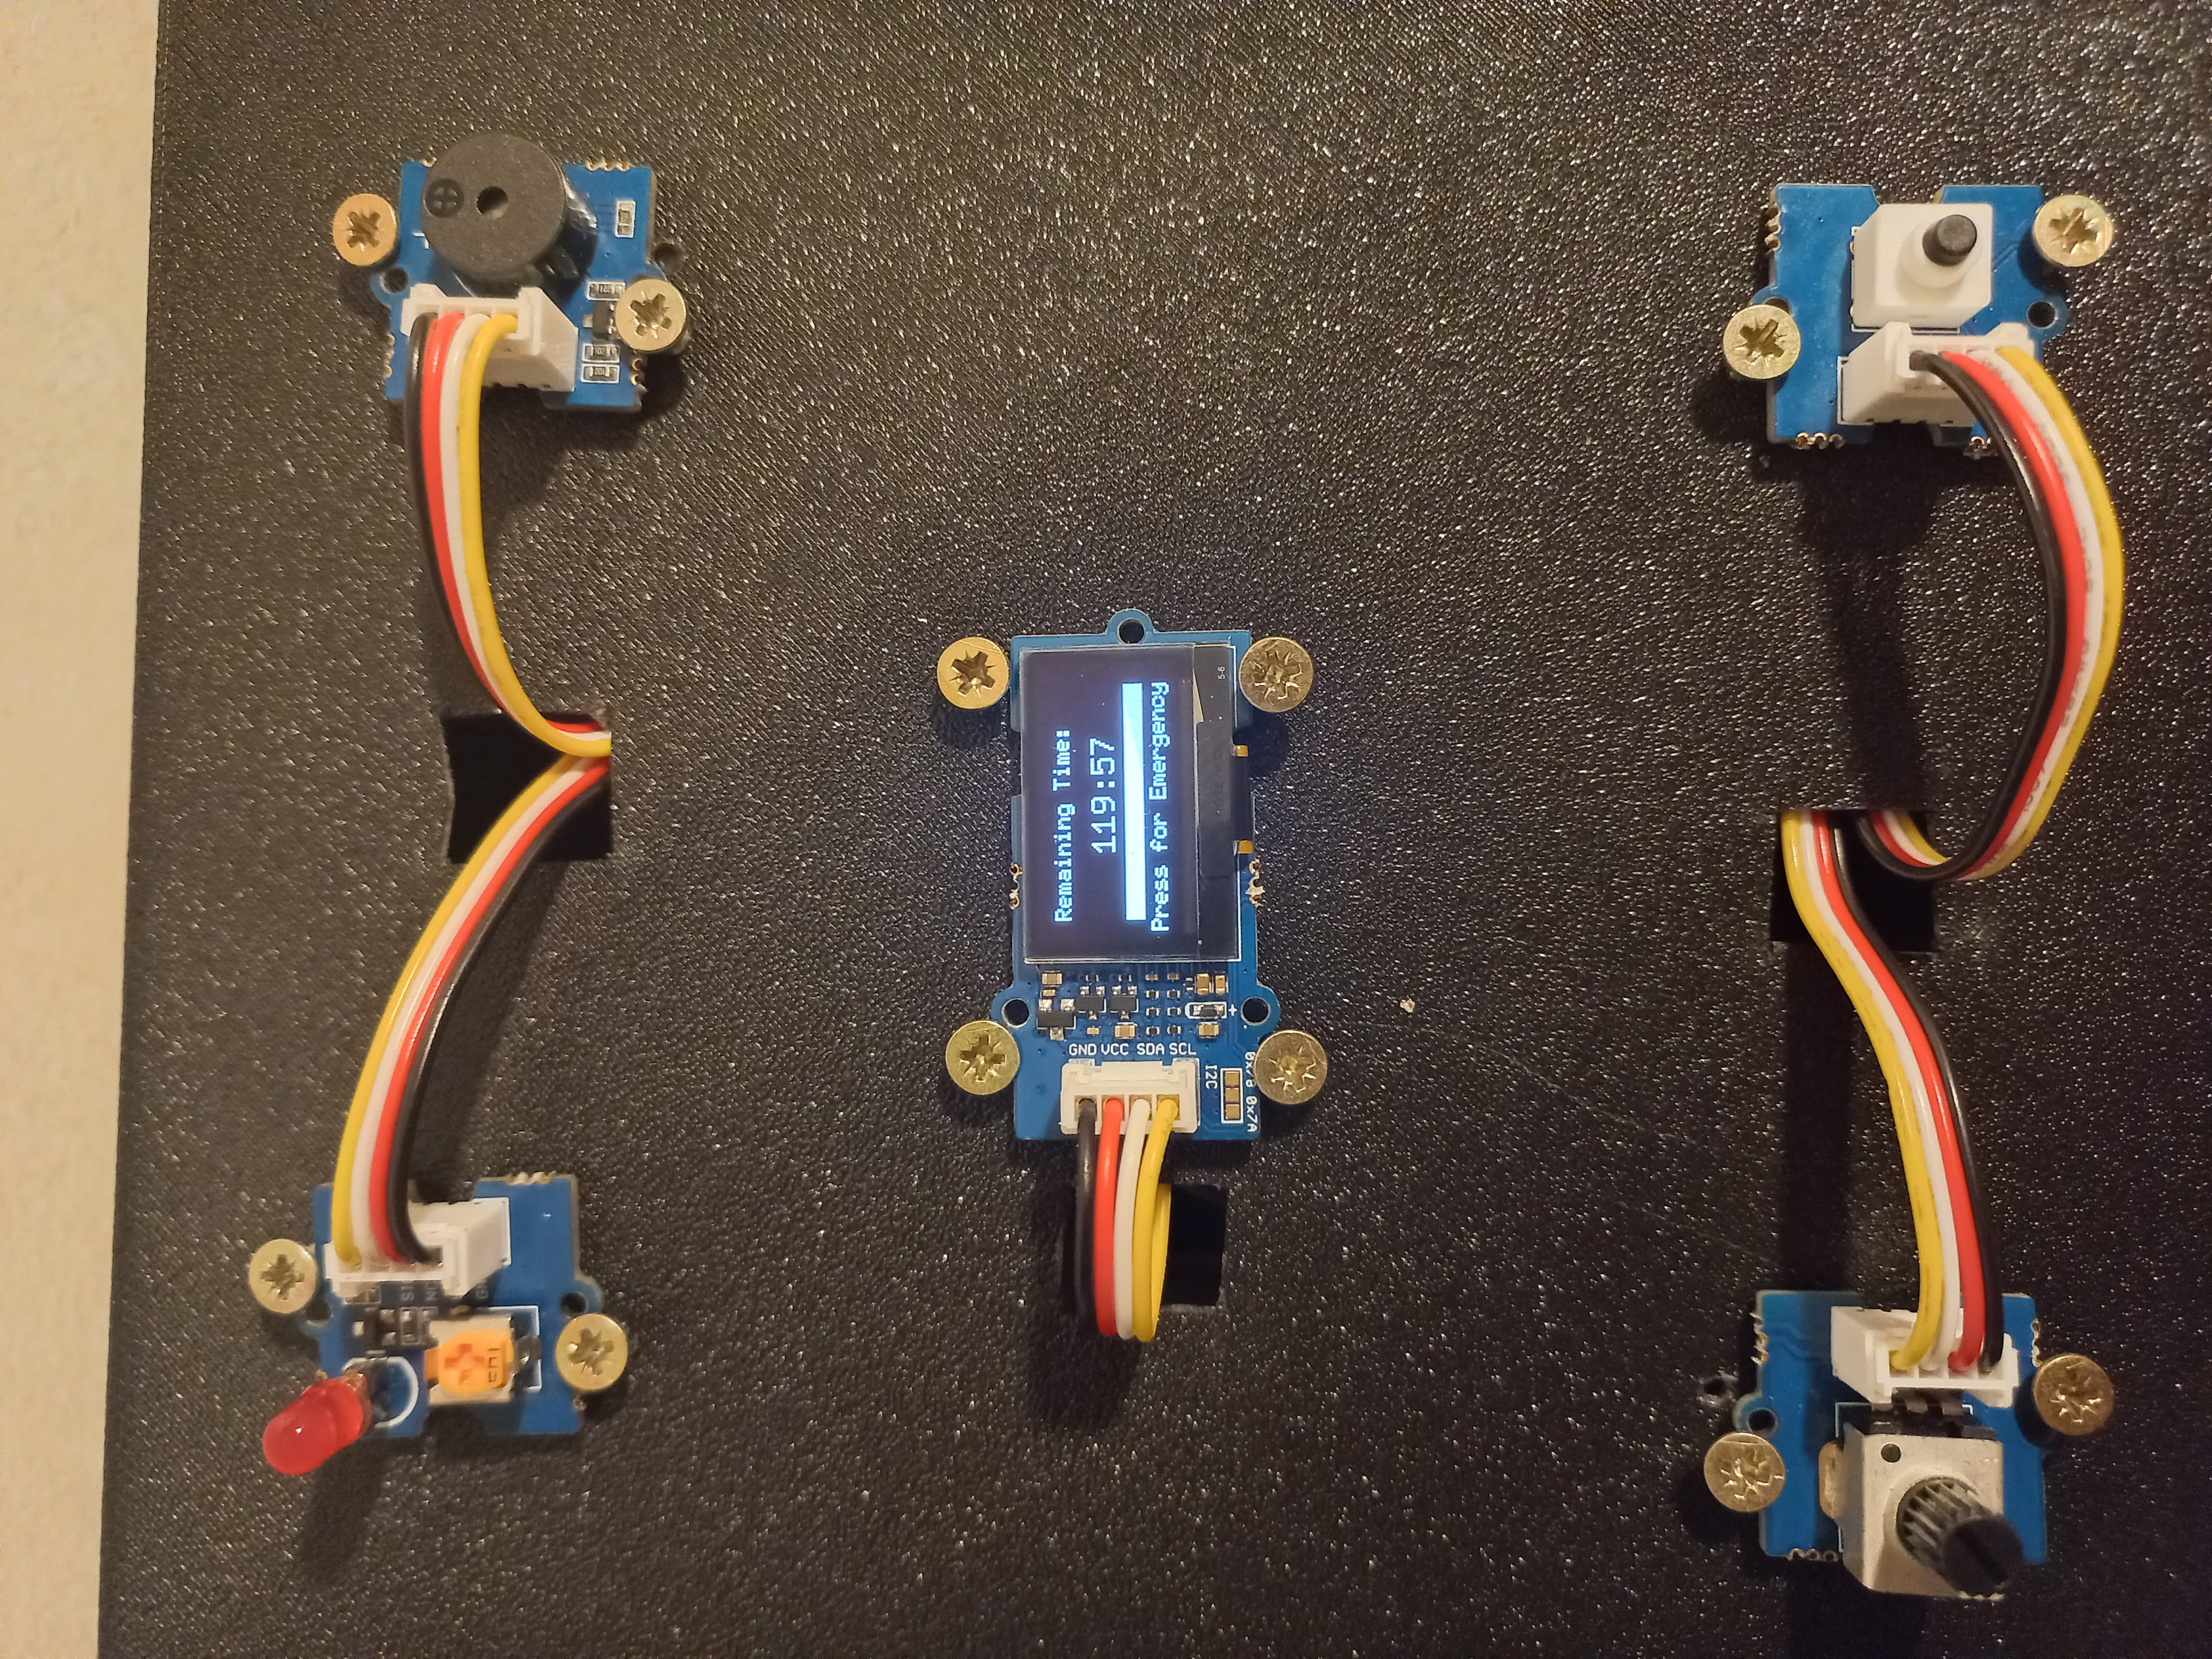
- Rotate the Potentiometer to choose your time (10s for demo, or 10m–2h).
- Press the button to confirm.
- Focus: The countdown (3-2-1) will play, the LED will flash, and the servo will LOCK the box.
- Dashboard:
- On your phone or laptop, connect to the WiFi:
LockBox_AP(Password:NT4T5). - Open your browser and go to
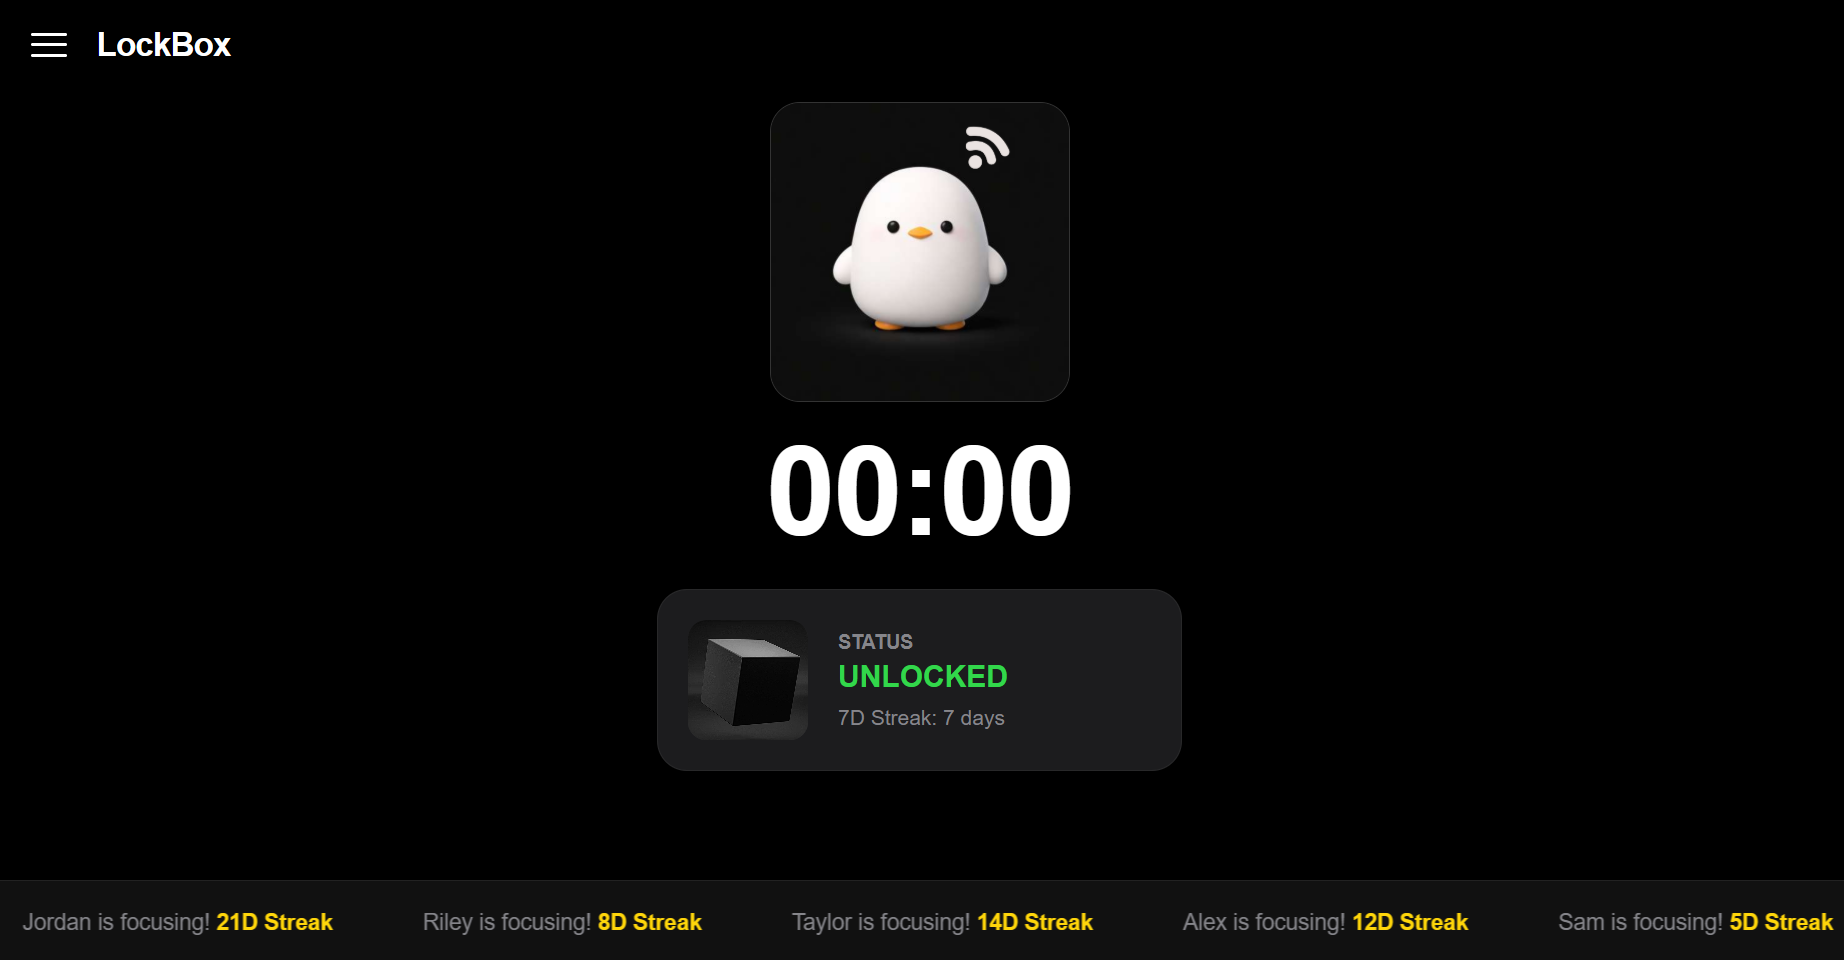
http://192.168.4.1. - Watch your timer and lock status update in real-time.
- On your phone or laptop, connect to the WiFi:
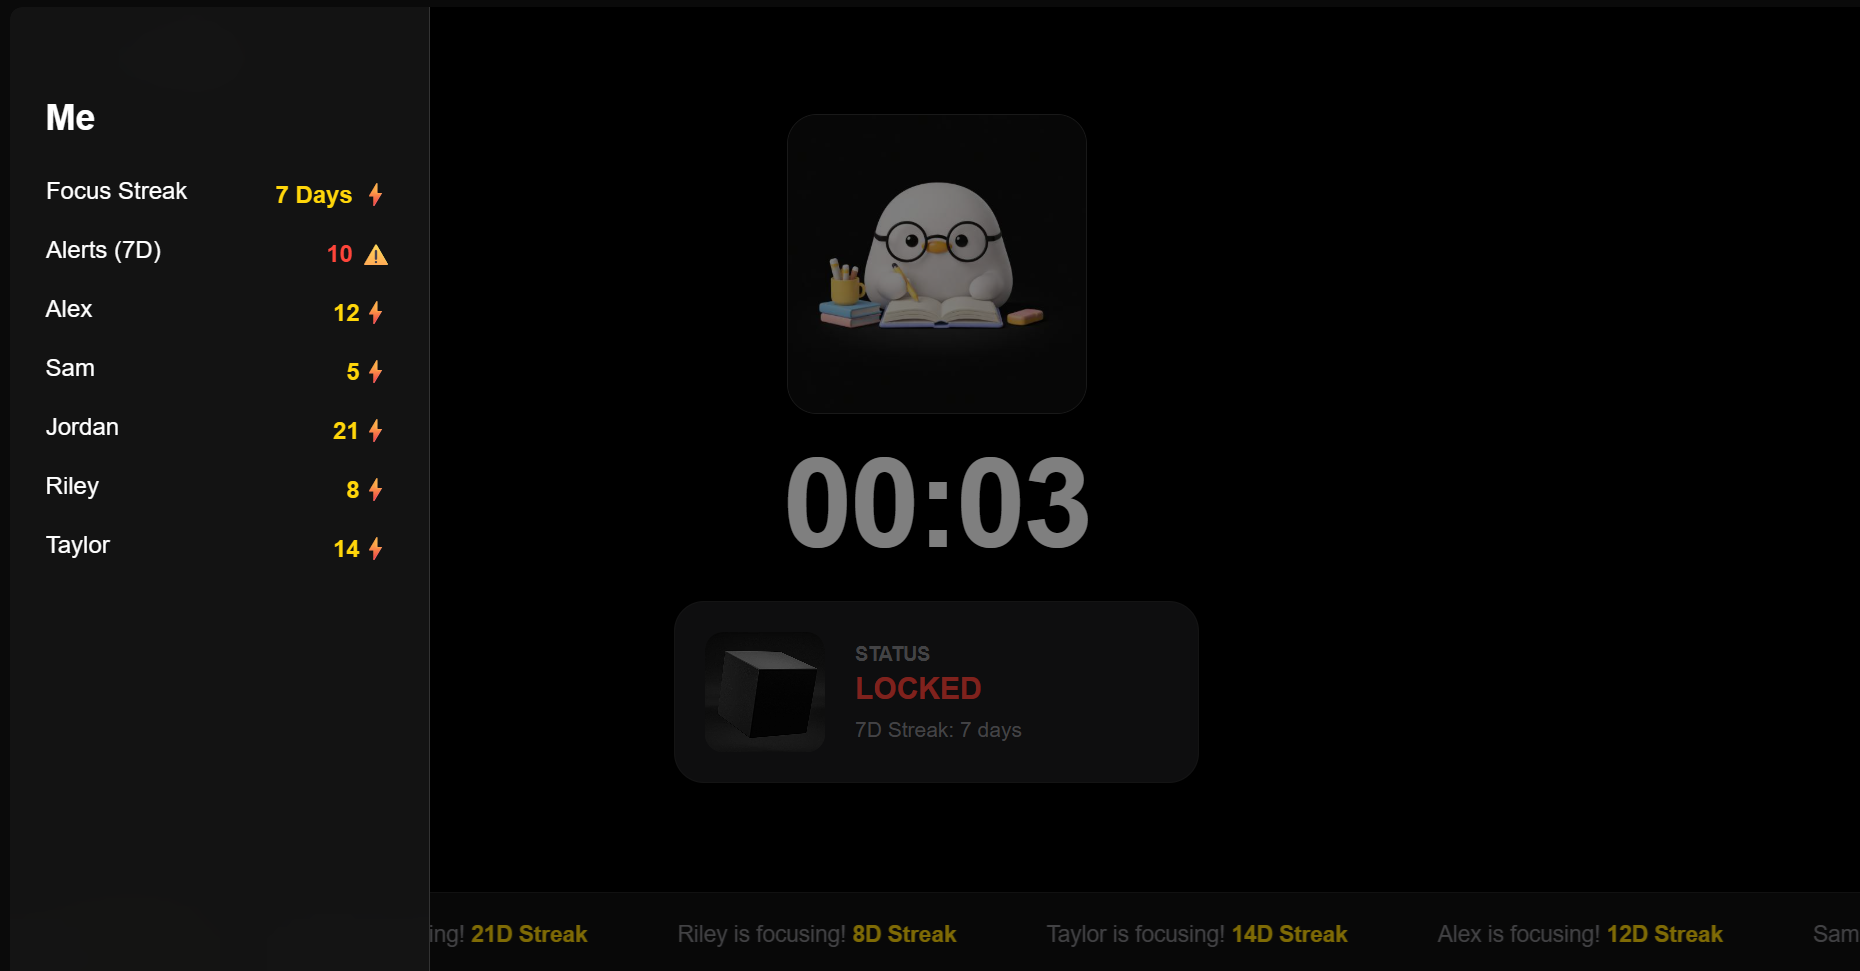
- Emergency: If you must open the box early, press the button. The dashboard will log the alert, and your "7D Streak" will be affected!
The dashboard is designed with Glassmorphism and Apple-inspired UI elements:
- Slide-out Menu: 3-line menu in the top-left for "Me" (Profile) and "Friends".
- Dynamic Mascot: Visual feedback based on your study state.
- Social Banner: A smooth-scrolling banner showing friend activity and streaks.
- Live Indicator: A heartbeat dot showing active communication between hardware and software.
 |
 |
 |
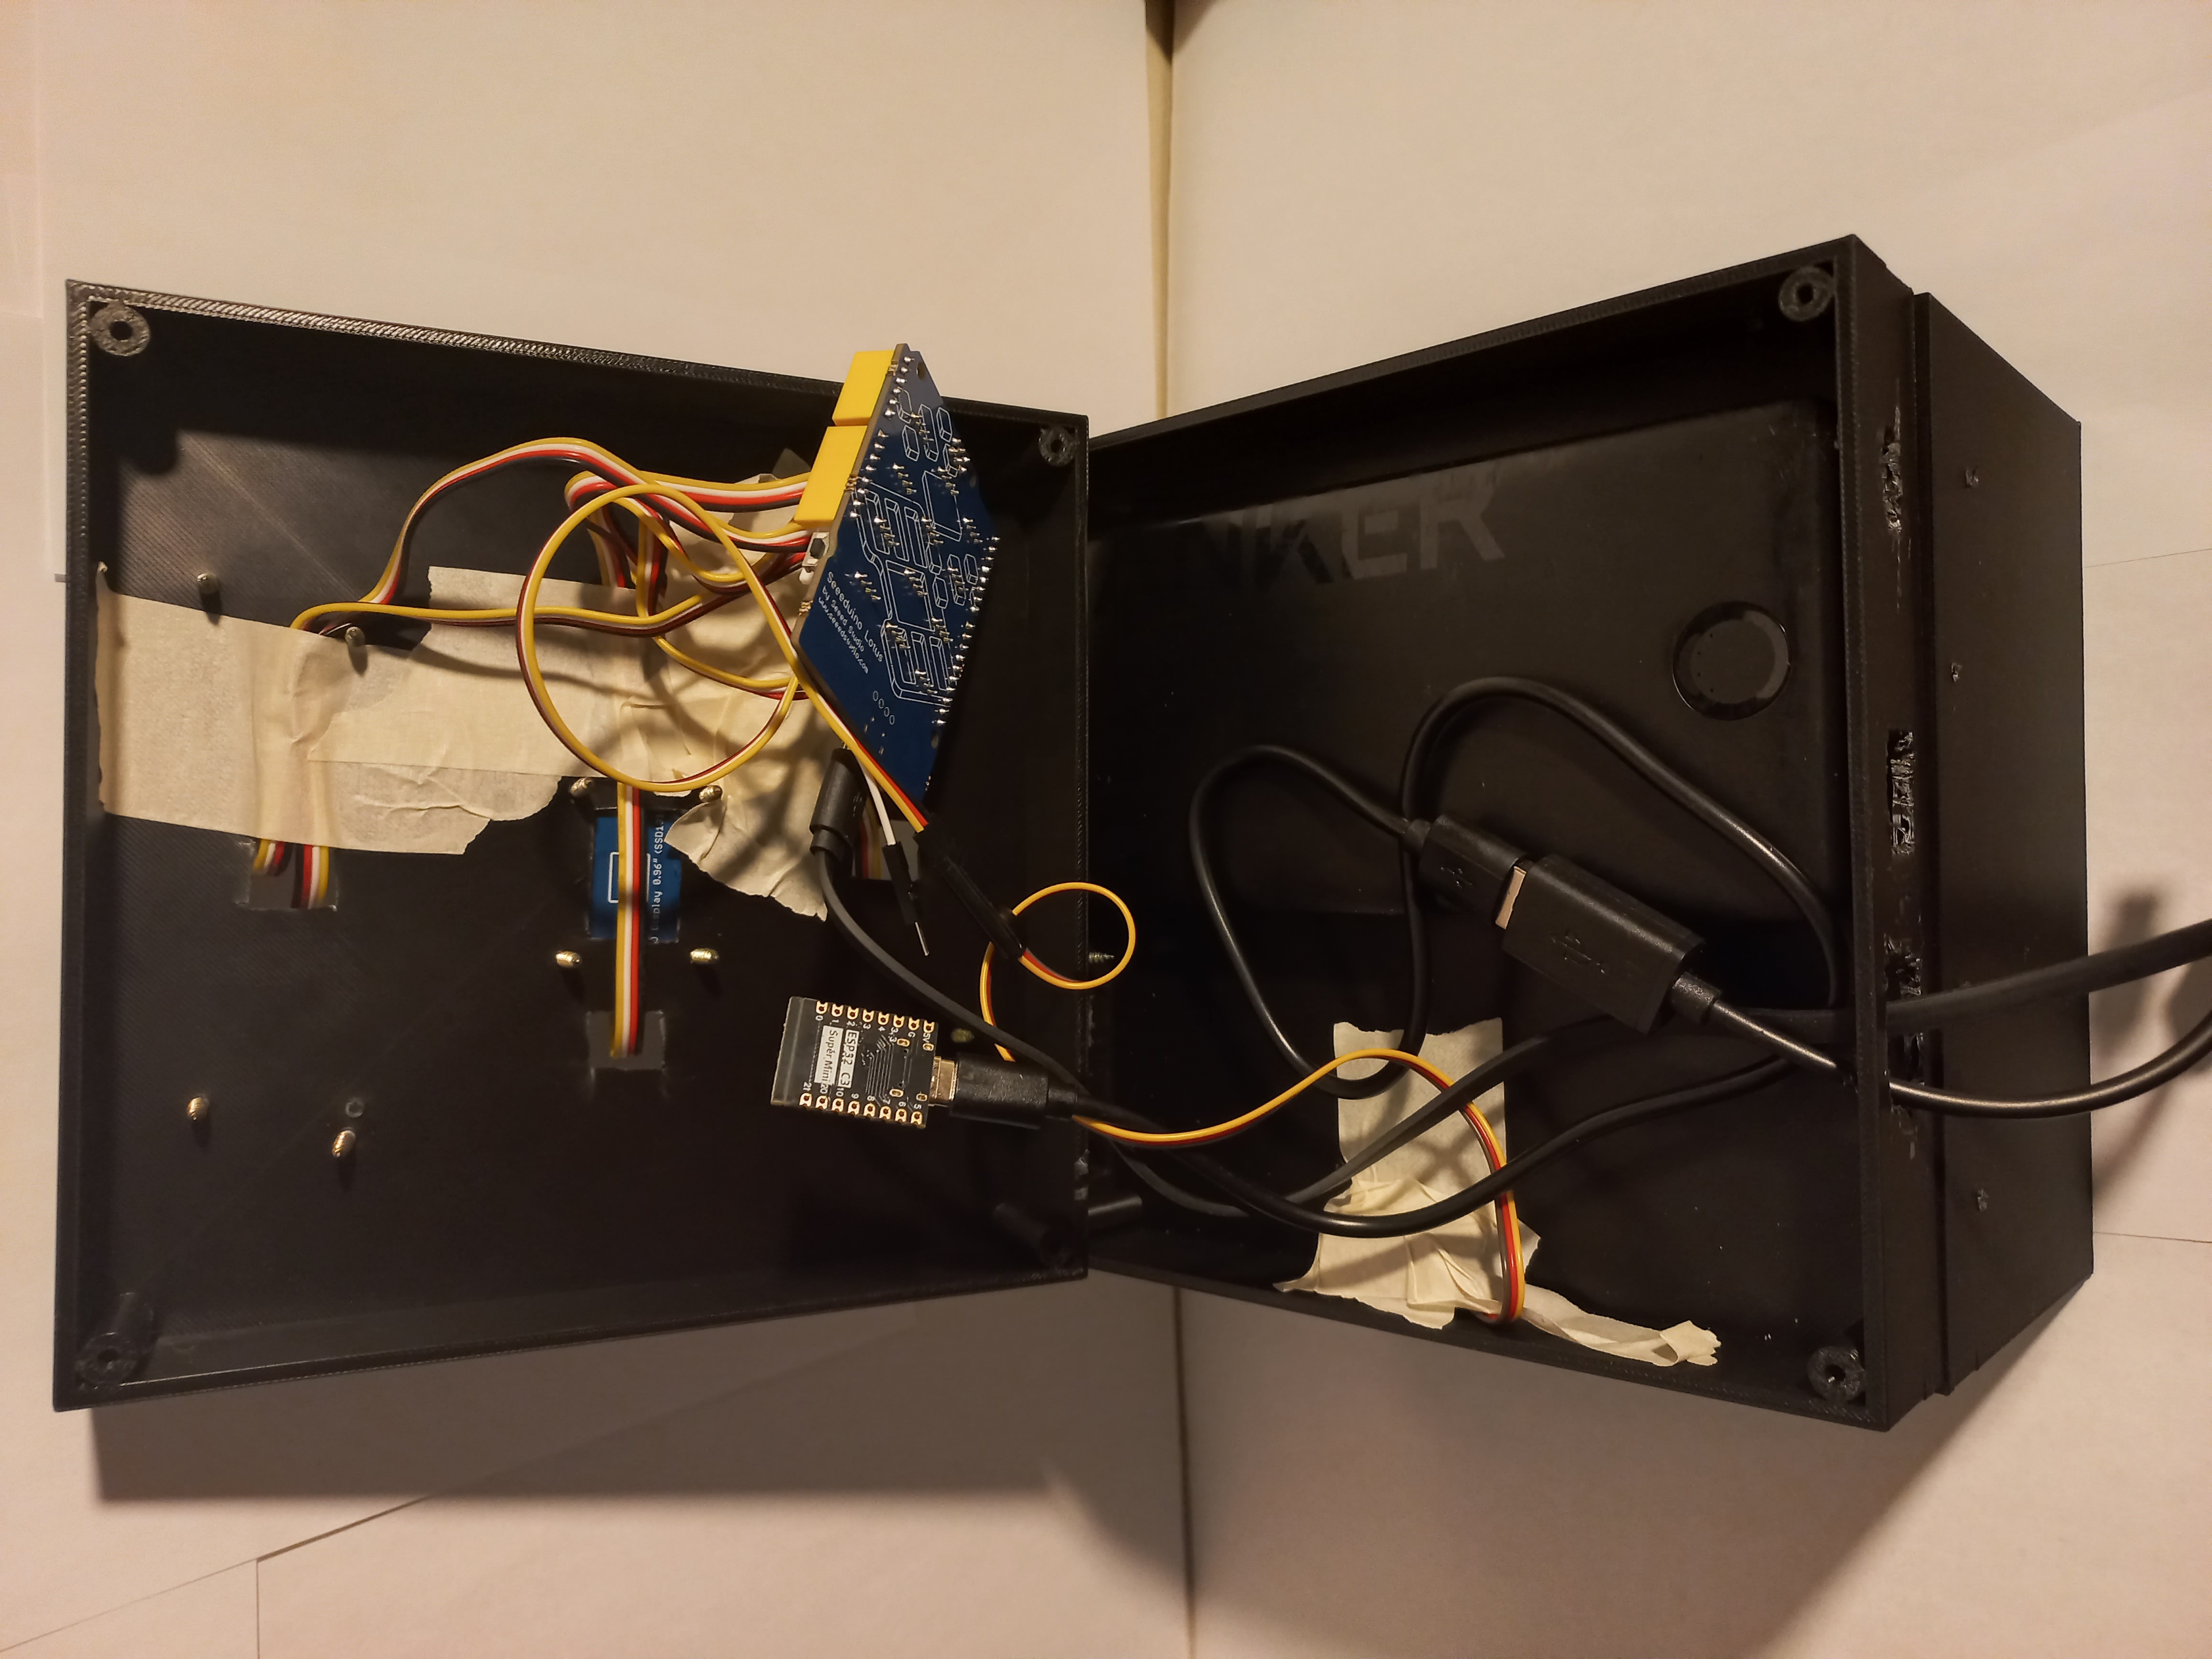 |
| Inside View | Hinge Detail | Top-Down View | Internal Components |
 |
 |
 |
 |
| Locked State | Success Screen | Emergency Trigger | Timer Selection |
 |
 |
 |
|
| Time Selection | Time Remaining | Ready UI |