Fly brain emulation using the FlyWire connectome — scaffold to build your own neural simulations.
Version · MIT License · Status: Alpha · TypeScript · React · Three.js
Website · 𝕏 X (Twitter) · Telegram
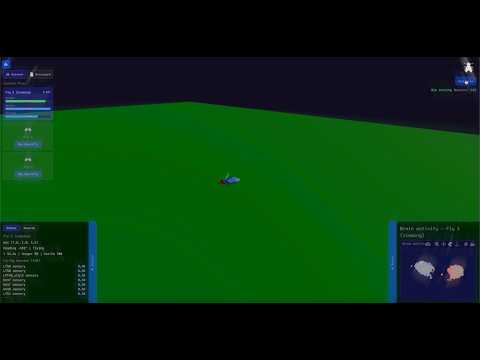
NeuroSim is an open-source fly brain emulation project. Stimuli drive neurons through a connectome-based simulation; motor output drives a 3D fly in the browser. Connect your wallet, deploy a fly, and click Start to run the simulation.
Status: Alpha — meant as a scaffold for building your own simulations or simulating your own behaviors. Use it as a starting point, extend it, and make it yours.
- Lore article: The First Multi-Behavior Brain Upload — the article that inspired this project
- Dataset: FlyWire Brain Dataset (FAFB v783) on Kaggle — the connectome data we use
┌──────────────────────────────────────────┐
│              Stimuli                     │
│   Input signals that drive neurons       │
└──────────────────┬───────────────────────┘
                   │
┌──────────────────▼───────────────────────┐
│         Connectome Simulation            │
│   FlyWire brain graph + toy neural sim   │
└──────────────────┬───────────────────────┘
                   │
┌──────────────────▼───────────────────────┐
│            Motor Output                  │
│   Fly behavior (position, orientation)   │
└──────────────────┬───────────────────────┘
                   │
┌──────────────────▼───────────────────────┐
│            3D Fly Viewer                 │
│   Web app: connect wallet, deploy, Start │
└──────────────────────────────────────────┘
- Connectome-based simulation — Uses the FlyWire FAFB v783 connectome
- Optional GPU acceleration — CUDA support for faster simulation (NVIDIA GPUs)
- 3D brain and fly viewer — Three.js + Plotly for brain visualization
- Wallet integration — Connect wallet, deploy a fly, run simulations
- plotly-cabal — We ship a patched Plotly build for brain 3D visualizations (see plotly-cabal/)
- Node.js 20+ and npm
- Kaggle account (for dataset access)
git clone https://github.com/ohnodev/neurosim.git
cd neurosimThe API needs data/connectome-subset.json. Download the dataset and process it:
npm run setup-kaggle    # Install Kaggle CLI
# Add API key: https://www.kaggle.com/settings → Create API token
# Save as ~/.kaggle/kaggle.json

npm run download-dataset
npm run process-connectome
Or download the FlyWire Brain Dataset manually, extract CSVs to data/raw/, and run npm run process-connectome.
The API talks to a standalone Rust brain service via Unix socket. Build and run it:
cd api/brain-sim-service && cargo build --release
# Or without CUDA: cargo build --release --no-default-features
cd ../..
Start the brain service before the API (or use PM2 with ecosystem.config.js which runs both). The API will exit if it cannot connect to the brain service.
GPU (optional): With CUDA installed, cargo build --release uses GPU. Without CUDA, use --no-default-features for CPU-only. Set USE_CUDA=1 or NEUROSIM_MODE=cuda to require GPU and refuse startup without it.
# API
cd api && npm install && npm run dev

# World (separate terminal)
cd world && npm install && npm run dev
Open the URL shown shown (e.g. http://localhost:5173), connect your wallet, deploy a fly, and click Start.
# 1. Install Kaggle CLI
npm run setup-kaggle
# Or manually: pip install kaggle

# 2. Add your API key (one-time)
# Go to https://www.kaggle.com/settings → Create API token
mkdir -p ~/.kaggle
mv ~/Downloads/kaggle.json ~/.kaggle/
chmod 600 ~/.kaggle/kaggle.json

# 3. Download dataset into data/raw/
npm run download-dataset

# 4. Process into connectome-subset.json
npm run process-connectome- Download FlyWire Brain Dataset (FAFB v783) from Kaggle
- Create
data/raw/and extract these files from the ZIP:connections.csv(required)coordinates.csv(required)classification.csv(required)consolidated_cell_types.csv(required)
- From repo root:
npm run process-connectome
Restart the API so it reloads the new connectome:
./pm2-manager.sh restart   # production
# or: cd api && npm run dev # development# Process connectome (after placing CSVs in data/raw/)
npm run process-connectome
# API
cd api && npm install && npm run dev
# World (separate terminal)
cd world && npm install && npm run dev
# Landing (separate terminal)
cd landing && npm install && npm run dev./pm2-manager.sh init
./pm2-manager.sh start
./pm2-manager.sh status
./pm2-manager.sh logs
./pm2-manager.sh restartnpm test # API unit tests + smoke (Vite build, optional API/PM2)
npm run test:api # API unit tests onlyFor tunnels, run npm run ngrok. Set NGROK_DOMAIN for a custom domain (e.g. NGROK_DOMAIN=your-domain.ngrok-free.app npm run ngrok). If unset, ngrok starts without --domain. For the world dev server, set NGROK_HOST to your ngrok host when using ngrok (adds it to Vite's allowedHosts).
MIT License — see LICENSE for details.