![]()
A feature-packed self-hosted cloud storage solution making it easy to host and store your files from anywhere!
Loving this open-source project? Leaving a ⭐ on the repository would be much appreciated! ❤️
- Feature-rich Web Interface.
- Full File Managament & Remote File Access.
- Gallery Feature.
- Secure Vault Feature.
- File Sharing via link or internally.
- External WebDAV Support.
- 2FA Account Security.
- Easy installation & guided system setup.
- Docker Support.
- Laravel
- React (via inertia.js)
- PHP & JavaScript
To setup the system, there are minimal requirements which include PHP for the Laravel framework that is being used, alongside PHP Composer to manage packages. Node.js is required to use Vite which compiles the front-end.
Tip
The prerequisites are automatically included with Docker Compose, thus it is recommended to use this for an "all-in-one" setup.
- PHP 8.2 & above.
- PHP Composer.
- Node.js (LTS recommended).
Lastly, it is recommended to have a web server installed and setup to host the web interface. It is recommended to use either Apache or Nginx which are the most popular open-source web servers.
Tip
For testing purposes, you can use the php artisan serve command in the root project path to start a local webserver. This is not recommended for production use. For development purposes, you can use composer run dev in your IDE to allow for live changes and updated during programming.
There are multiple ways of installing and setting up the system. You can either choose to install the system using Docker or through standalone methods. For beginners, we recommend using the Docker Compose "all-in-one" method to make the installation process as easy as possible.
Regardless of setup method, once the system is installed, there is an interactive server setup via the web interface which you will reach after installation.
The docker image was built as standalone in mind of users who may wish to integrate it into their existing infrastructure. You can access it easily via: https://hub.docker.com/repository/docker/thatguyjacobee/cloud-storage/general
For users that wish to have an "all-in-one" setup, continue with the Docker Compose method below.
The easiest way to setup the system is through the use of Docker Compose, specifically the docker-compose.yml template provided within the repository. This is because it is an "all-in-one" setup which has the main image, database and web server all ready to go.
Once you have copied the contents or the file itself from the repository, you must create a local .env file utilising the .env.sample template. Adjust the file with the necessary configuration and settings.
You must populate the APP_KEY field by generating a base64 key through a website such as here. You should format it as the following example: base64:IGjozRyuAI4S17c41CLjilOpOT97ypxAm+me6gMFCkE=. You should generate a key with 32 characters.
Now head back over into your docker-compose.yml file and ensure that the /path/to/.env is changed appropriately to the relative path to the docker-compose.yml file that you are currently creating.
You must also ensure that the MYSQL_ROOT_PASSWORD variable under the db-mysql service matches the DB_PASSWORD field in your .env. This must be identical, otherwise the system won't be able to communicate with the MySQL server.
Note
If you have already started the containers with the incorrect MYSQL_ROOT_PASSWORD parameter, you will have to purge the volume and run again before the password will be changed. You can do this through the docker volume rm cloud-mysql_data command (this is destructive, be warned).
Lastly, you should setup the Nginx server block. This is done simply by copying the nginx.conf template and placing it into the same directory as the docker compose file that you created. If the location is different, ensure that you update this under the volumes tab of the nginx service in the docker compose file.
With the .env file now linked and the database password setup, you can start the container using the docker compose up -d command. The images will be pulled and automatically started once ready.
At this time, you will need to migrate the database tables to your instance, which only needs to be done once. This can be done simply by running the following command: docker compose exec [container_name] php artisan migrate, where [container_name] is the name you put in the compose file. By default, this would be cloud-storage.
Tip
You can directly access the container simply by running docker exec -it [container_name] bash. This may be useful for viewing logs and the main project files.
You should now be able to access the website via http://[your_serverip]. For future updates, you simply have to pull the latest image which should be done automatically upon restart or can be done via the docker compose pull command. You should use docker volume rm cloud-storage_system-volume to remove the legacy files. Once this is done, simply run the containers again and the server will be up-to-date just as you left it off. :)
Once you can confirm it is accessible, head over to the First-time Setup Process section to proceed with the interactive setup.
The first step for installing the system as standalone is to download it. You can do this by heading over to the Releases section on the repository and downloading the .zip source code. You should use a tool such as 7-Zip to extract the files.
More advanced users can utilise Git to clone the repository to your system. This requires having Git installed. This is typically more convenient as you can easily fetch the latest updates, thus this is recommended if possible.
Since this is a standalone installation, you must ensure that all of the prerequisites mentioned previously are prepared.
For beginners, it is highly recommended to install the XAMPP tech stack because it comes with PHP, MySQL and the Apache web server. It is also cross-platform meaning you can install most of the prequisites quickly. Once XAMPP is installed, ensure that you start the necessary services as administrator and set them up to start automatically on system boot.
This fulfills most of the necessary prerequisites and even the web server, only leaving you with the installation of PHP Composer and Node.js.
Of course for advanced users, you are more than welcome to use whatever you wish, as long as you have the prequsities prepared on the host system and access to a database.
Once the files and prerequisities are ready, you should install all of the necessary modules and packages that the system uses.
Simply run npm install and composer install in the root of the project which will automatically download and install everything.
The the next step is to create a copy of the .env.sample file and rename it to .env.
Open the file in a text editor and adjust the parameters as needed to match your setup. The first 2 sections are the most important.
Once you have everything prepared, you should use the php artisan migrate command to build all of the necessary tables into your database.
At this point, you should have the system files ready, the prerequisites setup and the environment file prepared. At this stage, you will have to finish off the setup by configuring your selected web server, which will typically be either Apache or Nginx.
Tip
For testing purposes, you can use the php artisan serve command in the root project path to start a local webserver. This is not recommended for production use. For development purposes, you can use composer run dev in your IDE to allow for live changes and updated during programming.
The setup will involve configuring a virtual host in your selected web server. However, this differs between web servers and operating system thus this guide won't cover how to do this.
We recommend browsing the following resources based on your platform/web server for advice:
Once you have your web server ready, you should build the assets of the website by running the npm run build command. You should also run this command each time there are new updates that are pulled, to ensure that latest assets are built.
Note
It is highly recommended to edit the php.ini configuration file (found where PHP is installed) to increase the default upload and download limits. Specifically, it is recommended to adjust the following parameters with more appropriate values that suit you: upload_max_filesize, post_max_size, memory_limit, max_execution_time, max_input_time and max_file_uploads.
As a last step, it is highly recommended to setup SSL Certificates to enable HTTPS and secure communication to your server.
Upon the successful installation of the system, you should be able to access the web interface website. This will typically be in the format of http://[your_ipaddress] but can be different depending on whether you have setup a domain and/or you have setup SSL Certificates (recommended).
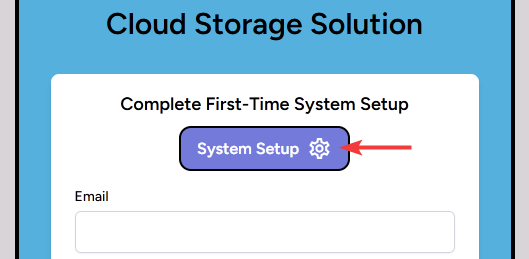
You will be able to see a First-Time System Setup button at the top of the login page, which is only visible when a fresh installation is perfromed. Select this.
This will take you through an interactive setup process which begins with the server configuration, to ensure that everything is as expected and functional. Your database must be setup and functional otherwise you won't be able to proceed.
You will also have the chance to review various core settings that you adjusted in your environmental variable (.env) file. The mail server is completely optional, thus you do not require this but you may miss out on extra functionality such as email verification and automated password reset.
If everything is as expected, the setup is almost complete. The last step will require you to create an administrator account. Ensure that you remember the credentials and that a strong password is selected because this is the root-user.
Once ready, submit and you are finished with the setup! Have fun using the system!
Below is a list of generally useful commands for managing your system.
| Command | Summary |
|---|---|
| php artisan migrate | Build all of the necessary tables into your database. |
| npm run build | Build the front-end assets (for new installations and updates). |
Need help setting up the system or experiencing some trouble? Feel free to head over to the Support Discord server and let me know!
Found a bug or issue with the latest build? Feel free to open an issue on this repository! I will respond as soon as possible.