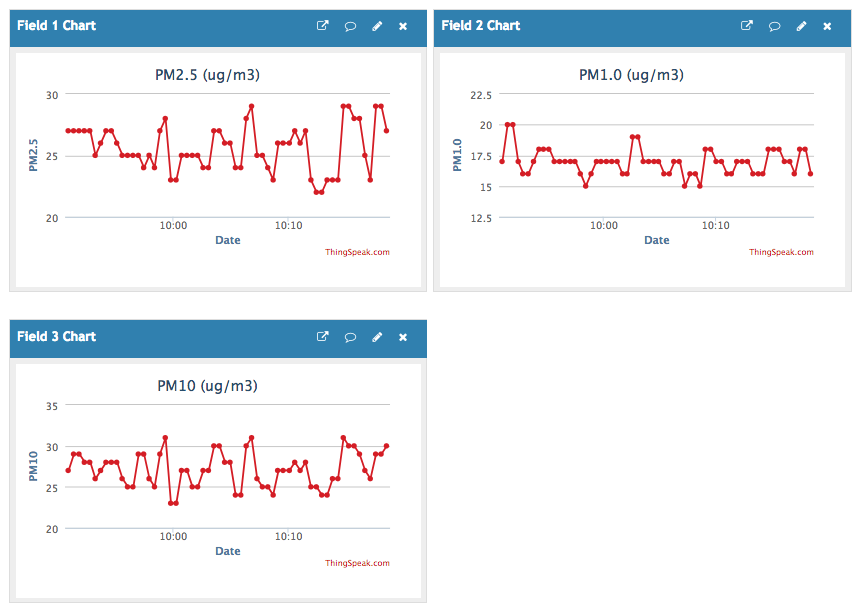
In this setup, you will use your NodeMCU to read PM1, PM2.5 and PM10 level from PMS5003, and display them on ThingSpeak in 20-second intervals.
You will need:
- NodeMCU v2 cp2102 (~$3)
- PMS5003 (~$14)
- Power supply module
- Breadboard
- MicroUSB
- Jumper wires
1. Set up NodeMCU:
Please follow the instructions available at the bottom of this page https://github.com/ICECapstone/Blink to set up your NodeMCU.
2. Physical connections:
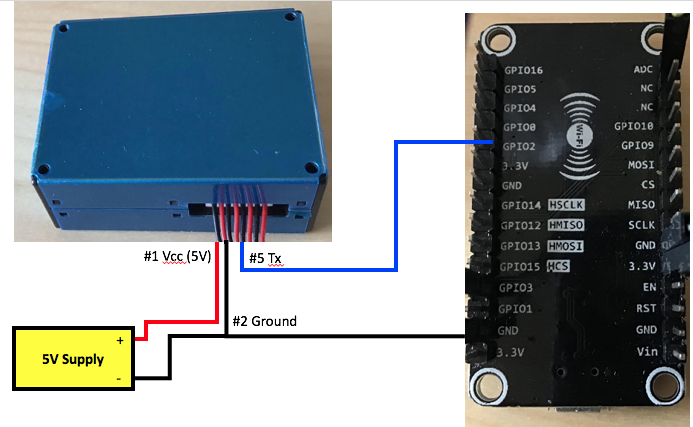
PMS5003 Vcc -> 5V of the power supply module
PMS5003 Ground -> Ground of the power supply module -> NodeMCU ground
PMS5003 TX -> GPIO2 of NodeMCU
3. Set up ThingSpeak:
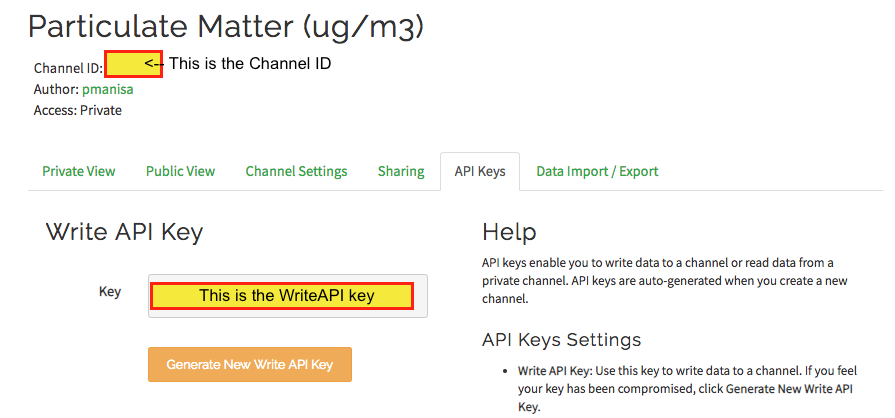
If you would like to see PM readings online, please set up your ThingsSpeak channel on www.thingspeak.com. Gather your 'API key' and 'Channel ID' for use in the code. Under Channel setting, enable three fields for data gathering (field 1: PM2.5; field 2: PM1.0; field3: PM10).
4. Upload the code to your NodeMCU:
Note: I slightly modified the original code (https://learn.adafruit.com/pm25-air-quality-sensor) to allow displaying data online via ThingSpeak. The code is available in this repository as 'PM25a.ino'. You will need to replace:
- ssid with your ssid
- password with your Wi-Fi password
- myWriteAPIKey with your ThingSpeak's writeAPI
- myChannelNumber with your ThingSpeak's channel number
5. Enjoy:
Once you upload the code, your NodeMCU starts gathering data from PMS5003, and data are displayed on ThingsSpeak.